The beautifully done anime shorts that are Star Wars: Visions are now streaming on Disney+, and costumes from another Star Wars animated series, Star Wars: The Bad Batch, are hitting Halloween and party stores for the season.
For everyone enjoying these shows, here’s a little mashup DIY, with a Chibi-style Lula doll keychain or charm.
Those who watch the Bad Batch know Lula is the beloved Tooka doll belonging to the rough but kindhearted Wrecker, who later passes his plush friend to his clone sister, Omega.
I have made Tooka dolls in the past using a pattern in Bonnie Burton’s nifty The Star Wars Craft Book, and there is a darling pattern for Lula from Kelly Knox on the official Star Wars website. In the spirit of anime, I’m going to take this idea and Chibi it up a bit.
The Chibi style is usually characterized by smaller, stubby limbs, a rounder body, a big exaggerated head and eyes, and, in my opinion, just overall cuddly cuteness. Lula is a perfect candidate for a Chibi makeover.
You need:
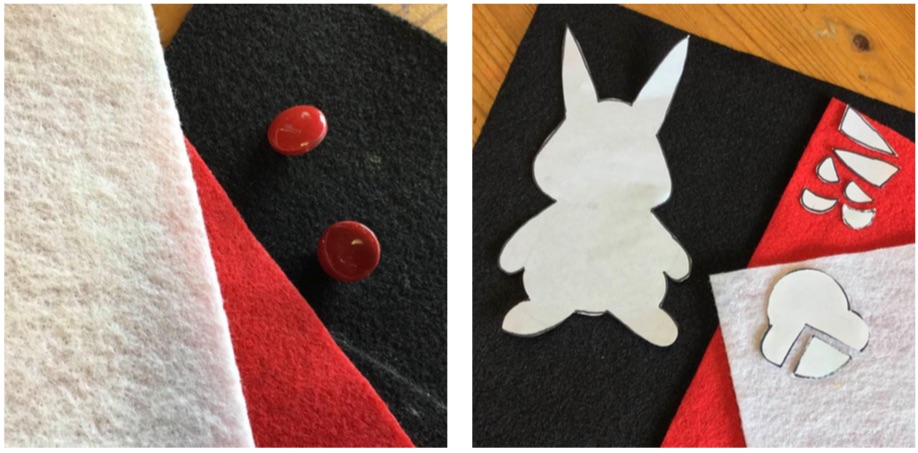
• One sheet each of black, red, and white felt
• Two red fabric-covered or plastic buttons
• Some light poly fiberfill or rice for the stuffing
• One plain black elastic hair tie for the loop
First, print out this basic template:
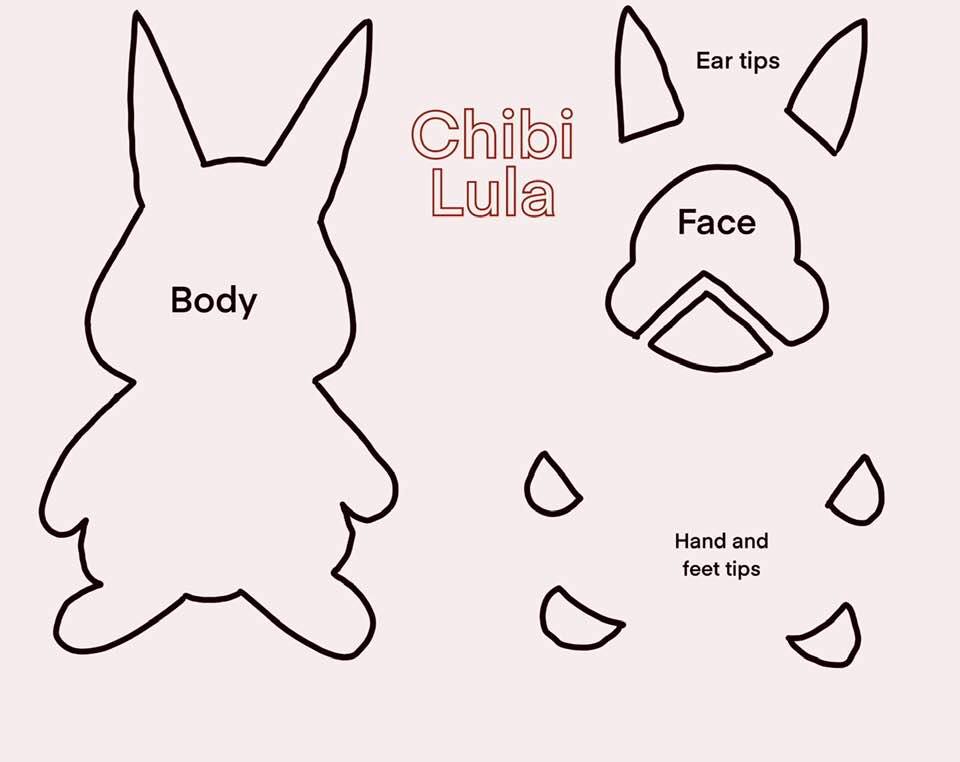
Cut out the two pieces of the body pattern in black felt. Note the larger head size, and the legs and arms are a little shorter. That is the Chibi style. Put these aside before you sew them.
Cut out two each of the arms, legs, and ear tips in red, and one out of the white face pieces.
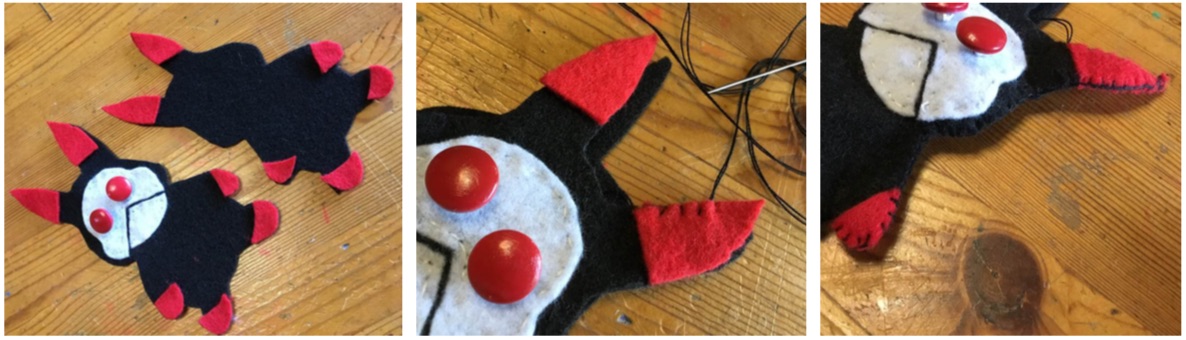
On one of the body pieces, tack on the face pieces with white thread using a basic running stitch.
Sew on the eyes. Note that the “real” Lula’s eyes are adorable red buttons, but the buttons should be just a teeny bit bigger and oversized for the Chibi look. Think wide-eyed happy places.

Use tacky craft glue to attach tips of the arms, legs, and ears to each of the body pieces.
Now, put the two sides together. Place the two body pieces facing out (not inward). Starting at the inside of one ear, stitch a good, tight blanket stitch with embroidery floss all the way around, leaving the top of the head between the ears open. Use black thread all the way around, or change to red around the appendage tips. It will look cute either way.
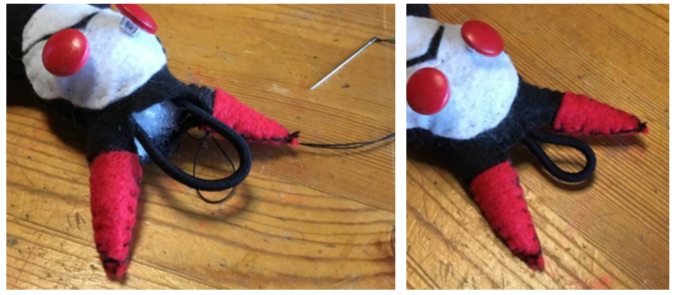
Once the entire body is circled, stuff it with the rice or fiberfill. Sew the open space halfway, then place the elastic hairpiece halfway down in the center of the head. Continue sewing, making sure to go through the elastic piece to hold it in place. Close up the opening. Do a final go-over of all the edges to make sure there are no holes or gaps where the filling can escape. Use an extra stitch or two on the places that need closing up, if needed. The finished piece will be about 4″ tall.
There it is: a little Chibi (sorta) Lula!
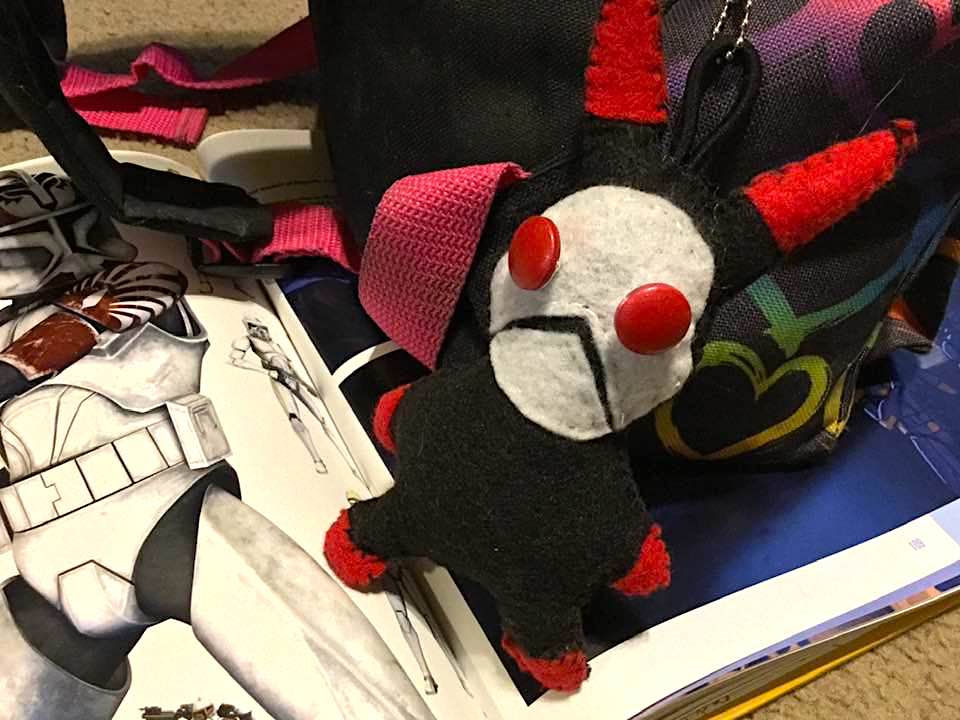
Add to it a little beaded keychain, small key ring, or carabiner clip to hook it to backpack or keys, or make an extra for another special friend in need of a smile.