The remnants of winter are slowly fading away, spring is here, and the blossoms are in full bloom.
In many places, even in my own desert city, cherry, apple, plum, and other blossoming trees are one of the most beautiful sights to remind us of the new season.
These blossoming trees even played a part in the look of the latest John Wick movie, are a common sight in the spring aesthetic in animated films from Disney to Studio Ghibli.
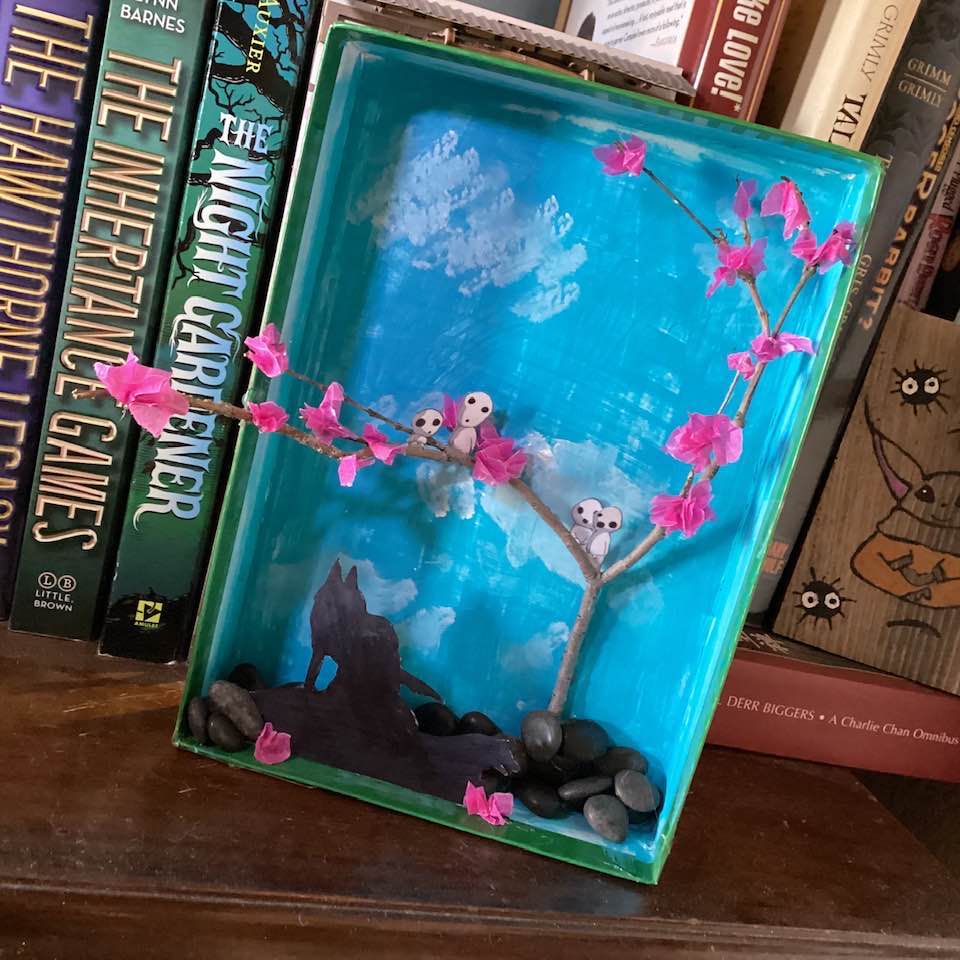
In celebration of spring and the instant beauty tree blossoms add to the landscape, we’re going to turn a leftover piece of winter into a spring “Twig Tree” shadowbox…with a fun little pop culture edge.
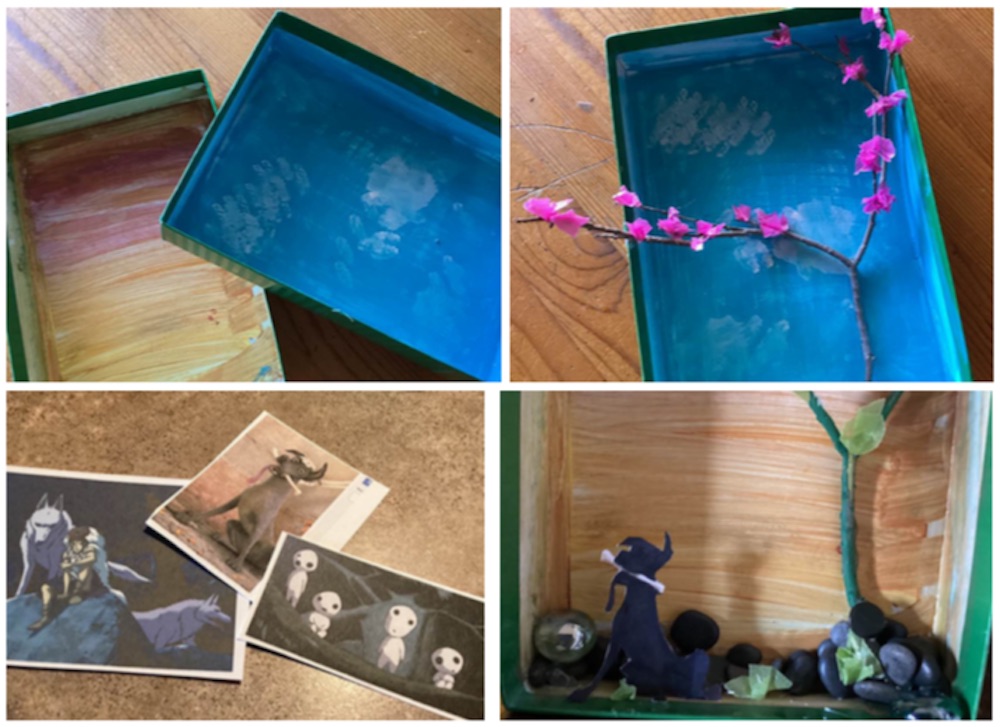
First you need a twig! Got out and find a couple of small little twigs from the dead pieces of trees that fall off during the winter. Make sure it has some little branched out pieces of its own, because this dead twig is going to be a new little “tree” soon.

Now, find some pink and/or white tissue, origami paper, or facial issue, and tear it into little pieces. Pinch the middle of these little pieces, so they are wadded up slightly. Not enough so they are a tight ball, but enough to have some petal like texture. These are your “blossoms”.
Using a glue gun or craft glue, attach these little blossoms in small bunches to the ends of your branches, until it looks like a blossom tree in full spring bloom. Put it aside.
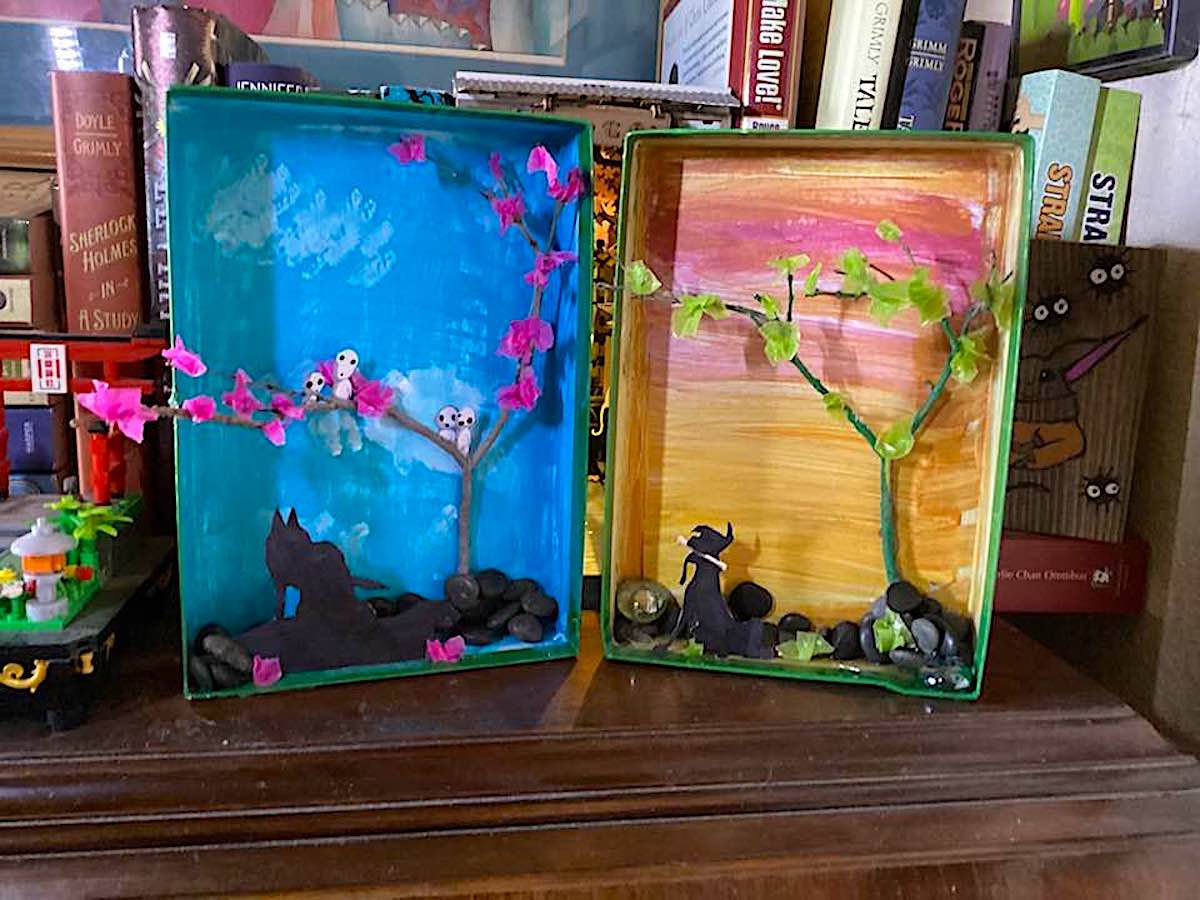
Next find an old small box top, like the kind you would get jewelry or small gifts in, and paint the inside to look like a sky. I like blue skies with some fluffy clouds in spring, but sunsets are also beautiful.
Glue the “trunk” of the tree to inside of the box with a glue gun, and head back outside. It is time to find some small pebbles!
Glue the pebbles along the bottom of the box, and around the tree. You can leave them natural colors or dab some green paint on them for variety.
That’s a simple little spring tree shadowbox.
Now, let’s have a little fun with it by adding an appropriate silhouette cut out. You don’t have to be a great artist. You just need to be able to trace around a picture. Find a simple image from a favorite movie, comic or manga, and print it out on white cardstock, so the images are a bout a third of the height of the shadowbox.
Cut out the image, and use paint or a black felt tip marker to turn it into a little silhouette. Glue it to the bottom of your shadowbox, and glue a couple of little blossoms or pebbles in front of it to give it some depth.
You can leave them as the little photos, but they look much cooler in little silhouette form.
It’s all done, and ready to display!

If you want another vibe besides the blossoms, try a different type of tree by simply changing the color scheme. Paint the twig white and add green paper for an Aspen, or paint it green, and add yellow paper for a Southwest Palo Verde. All three look cool, and you can add different types of characters to them that fit the region.
This little project is cool for three reasons. It gets us outside enjoying a new spring day. It lets us use what we already have and turn it into something new and creative. Most of all, it gives you a little piece of spring to hang onto and enjoy the entire year.