Last week, I looked at upcycling clear plastic into cool miniature plants as an easy craft that works well with plastic both thick and thin.
This week, I’ll show you how to use certain plastics from items like take-out containers to make a craft you and your kids might have already been doing for some time: shrink art!
Commercially, we know shrink art via the brand Shrinky Dinks, which has been around since 1973. This item was created by a Wisconsin-based maker, Betty Morris. The shrinking process can even be part of a STEM project, and a good article and project from Carnegie Mellon University’s Gelfand Center give a nice explanation of the science behind the shrinking (aka molecular rearranging of polymer materials).
I love this upcycling idea, because you don’t always want to dispose of those containers, but you can only keep so much of them in your house. This helps provide a use and a new life for these items without adding to home kitchen cabinet clutter.
First, you need to use #6 type plastic for these to work properly. Look at the bottom of the container for the number symbol—the little recyclable triangle for the number inside. If it is a 6, you’re good to go. The #5 plastic works as well if you can’t find #6, but #6 is the ideal plastic I have seen many home crafters and teachers use.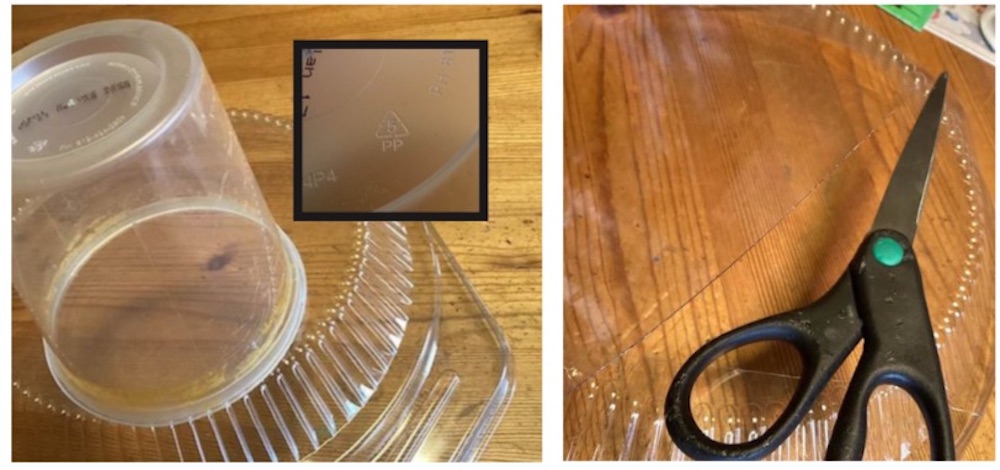
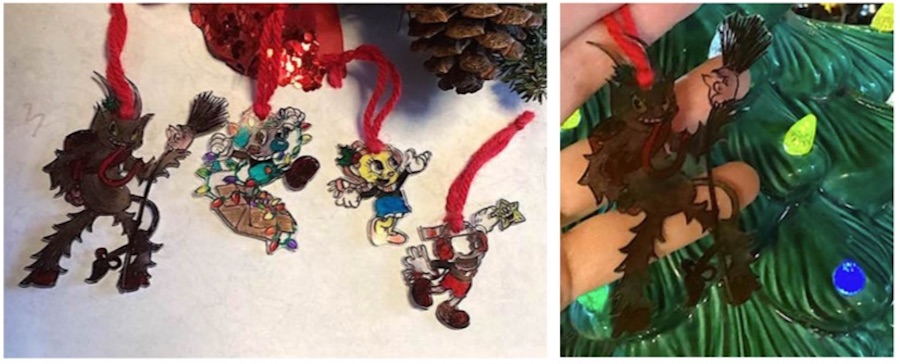
Cut out some smooth plastic pieces to begin. Use as big a piece as you can find.
Now, just like with commercial shrink art sheets, draw (or trace) the image you want. Since most of the upcycled plastic we use is clear and smooth, felt tip markers (like Sharpies) work best for this. Color them when the outline is finished.
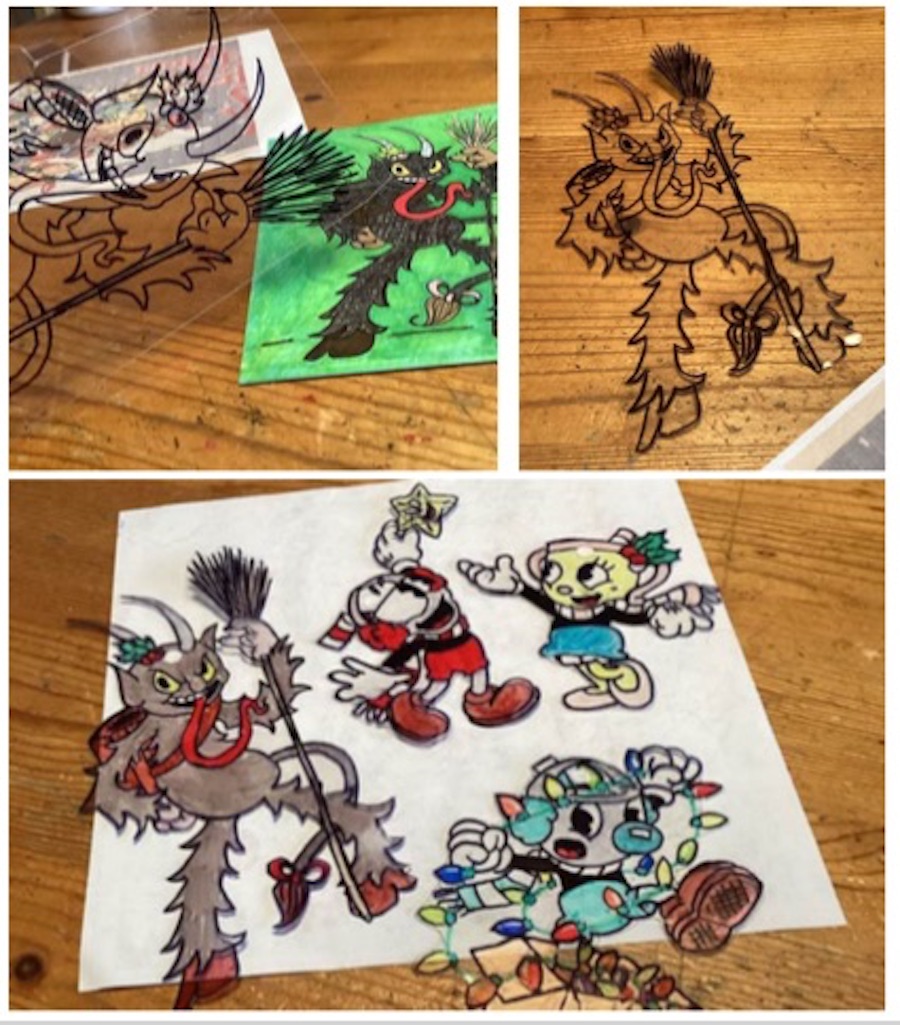
Remember, these will shrink to about one-third(ish) of their original sizes, so make sure your original image is large enough to create the final piece you want.
Also, if you are creating an ornament (or another hanging item like a suncatcher or jewelry piece), use a hole puncher to make a hole before you bake it.
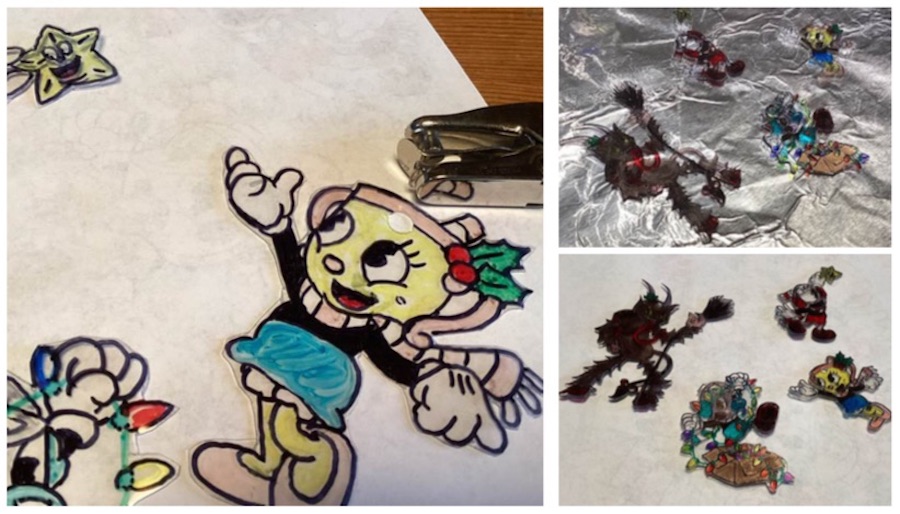
Place the items on a cookie sheet, lined with aluminum foil to keep everything clean, and bake them at 350° for about 2 or 3 minutes. If you have a window in your oven, you can check to see when they flatten, then remove them at that point. They will curl up first, just like with the commercial shrink art plastic. Wait until they are flat to carry on.
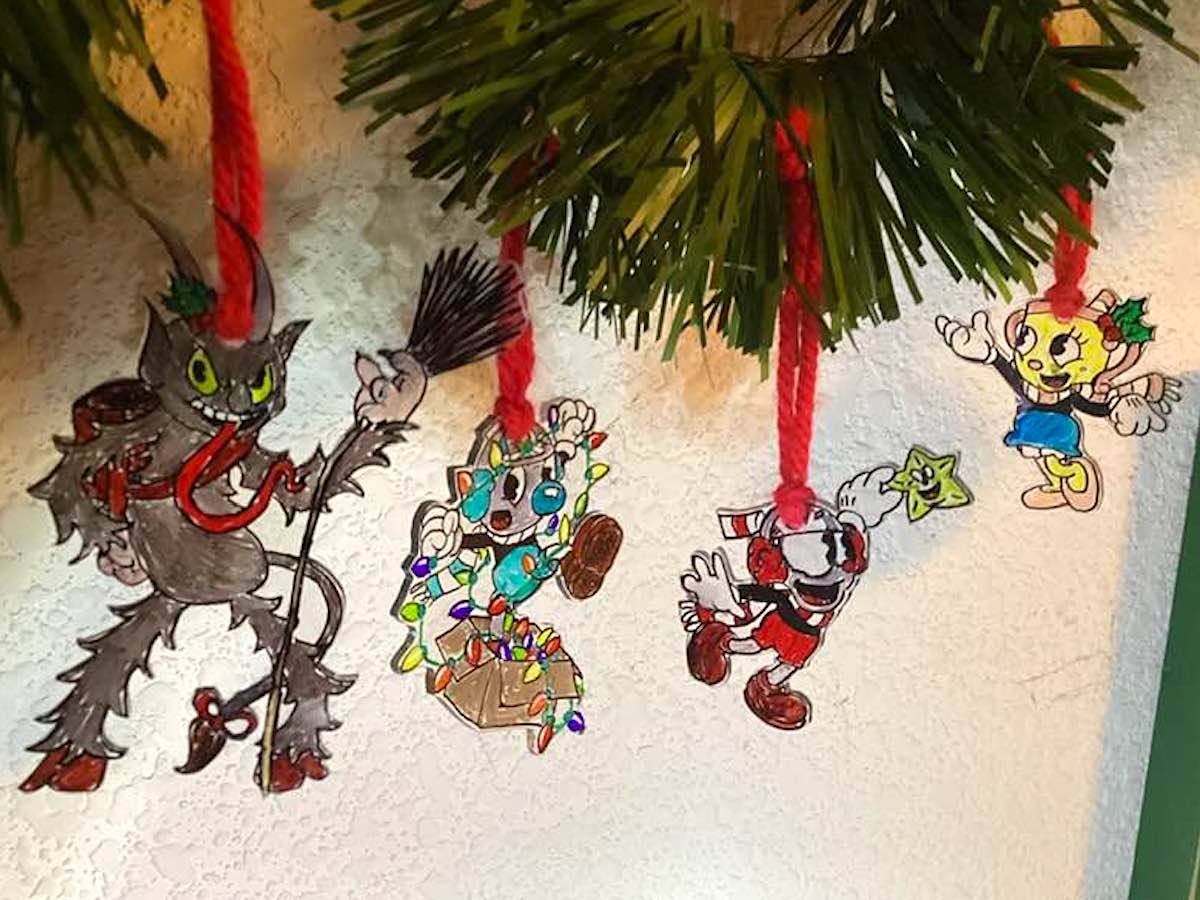
Let them cool, and add more color with marker or paint if you feel they need it. Cover the painted side with some sort of decoupage or spray sealant. If these are large enough, sometimes embellishments like little jewels or glitter add a nice touch, particularly for holiday tree trimming ornaments.
There you have it: homemade shrink art! Add an ornament hook or ribbon if you want to hang it. You can add a piece of double-sided scrapbook tape, a magnet, or a thumbtack to the back. Or, you can attach them to a chain link to attach to a necklace, bracelet, or earring hook.
Basically, do whatever you would do with commercially purchased shrink art sheets. The only difference is you can enjoy the bonus of knowing you found another way to lessen clutter and waste in the house.


