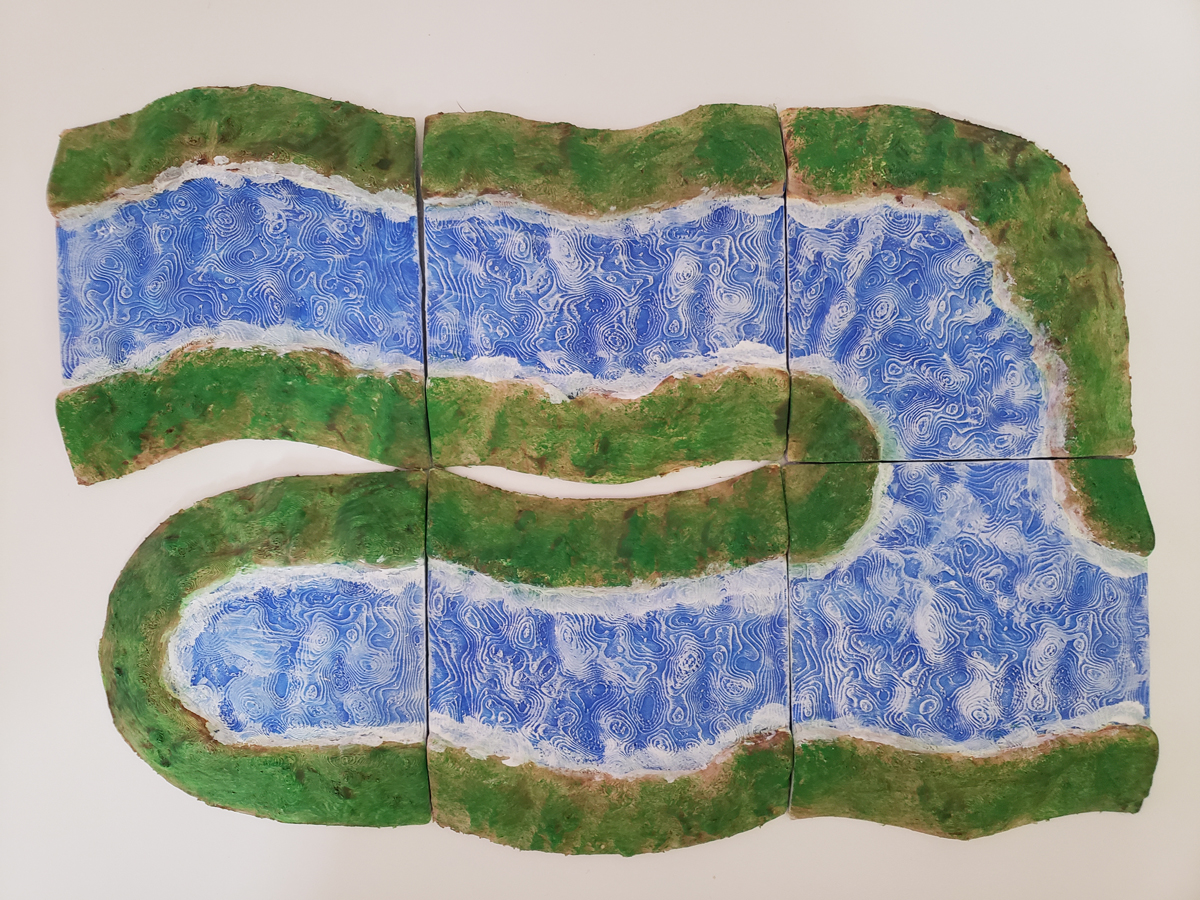
Sometimes printing projects don’t always happen in the order that you might expect. I started writing “Printed and Painted” articles with the Tower of Terror and the Tome of Portals. However, neither of these were technically the first gaming or prop projects that we printed. Our first bigger project was actually a Stream Set from Fat Dragon Games, which, like the Tower of Terror, was included in a Humble Bundle deal. It wasn’t the first project I had completed, however, because I was working on painting some other things from Dwarven Forge, and then I prioritized painting the stuff my kids were the most excited about. The nice thing is I was able to use some things I had learned in my previous painting adventures to apply to this job as well as pull in some of the new brushes I got for Mother’s Day. Part of what drew me to this set, in particular, was that I liked the modular nature of the pieces and of the sets we had from Dwarven Forge. Streams were not a thing we had in our collection yet.
As before, I will preface this by noting that none of the products I will reference were provided to me by any sort of sponsor or company. Some we selected on our own, others were recommended to us or were mentioned by someone in the gaming community online.
Printing
Just like in our previous projects, this was printed on our FDM printer (a Creality CR-6 SE). This was our earliest big project, so I will straight up admit that was filled with quite a bit of learning experiences about what settings we could use to optimize quality and time as well as learning how each setting impacted what we did. Not that we had never printed anything before, but I feel like this is the first project where our hobby became less random dabbling and more “alright, this is an actually dedicated hobby happening in our house.” As a result, our print times for the first and final pieces had a much bigger variety in lengths, etc, especially as we sorted out what sort of rafts were helpful versus what was time-sucking overkill. (You live and learn.) I also gathered a small collection of rafts I sometimes use to quickly test out paint colors and compare shades for when I need to get a feel for what color actually looks like out of the bottle and dried. I don’t have pictures of the unpainted version of these pieces yet because, at that time, it hadn’t occurred to me to actually start writing these projects up, and when I was sharing pictures with friends it was of completely painted pieces.
These are the settings and filament my husband was using by the end:
- Time: Around 7 hours per piece.
- Filament: SUNLU PLA Silver 1.75mm.
- Printer settings: 0.4mm nozzle, 0.2mm layer height, default width, 10% infill, 50mm/sec print speed, 1 mm wall top and bottom, raft to keep corners from lifting.
Painting
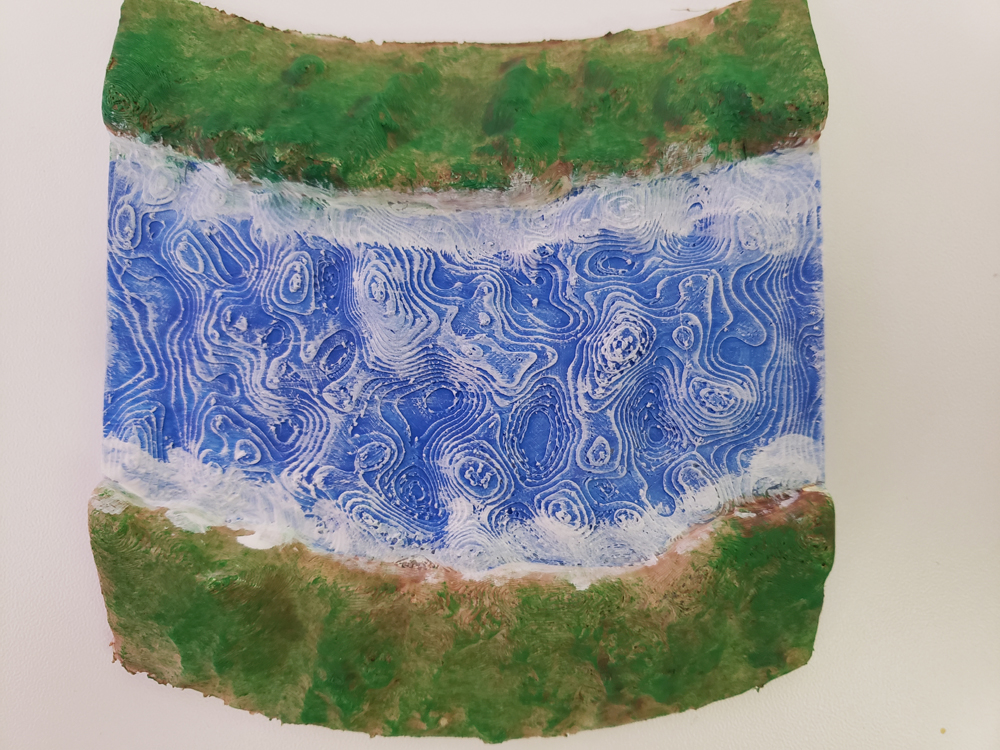
While my husband, J, tends to be the Head of Printing in our house, the painting end of things is where I tag in. When I envisioned what I wanted these pieces to look like, I liked the idea of the grass being on top of dirt, where you’d see more dirt along the banks with grass done in a way where you see those little dirt spaces peeking out like you would in a real-world nature situation. For my painting, I use primers and a variety of paints from the different Scale 75 lines. I primed in two colors from the Instant Color line, the off-white Bone Charm for anything not water and the white-based Holy Charm for the water. To pull off the look I wanted, I ended up watering down Bosh Chestnut from the Fantasy & Games line with one drop of paint to three drops of the Dispel Medium from the Instant Colors line. I then did the water Tesla Blue from the Scale Color line. For the rocks, I wanted to mix things up a bit and not just do a black rock with white dry brushing on the top mix. The rocks I did a base in Petroleum Grey from Scale color.


Once the base colors were down, the next part was made up of creative dry brushing. For the greenery, I actually used a Medium Citadel Terrain Brush and sort of tapped it across the dirt area until I got decent coverage. I did the main green layer in Irati Green from Scale Color and then added a little Black Forest Green from Scale Color on the top so there’s some shade variation. I’m actually pretty pleased with the way it turned out. For the rocks, I dry brushed Rainy Gray on top with some dry brushes from Army Painter. I think it turned out decent, although I admit it does not have the same contrast level as with my Tower of Terror stone, but I think it worked. The dry brushing did get a little heavier in areas where a little green got onto the rocks and I had to cover it up a touch. I used one of my basic Crayola brushes to do most of the water dry brushing in just a plain White from Scale Color. To make things sort of foamy along the banks I just dry taped paint along the edge with the same brush. It also helped to cover up places where the water paint got a touch too high on the banks. I used a tinier Citadel Brush to dry to tap foam around the rocks in the stream, which was easier on some rocks than others without getting paint in the wrong places. This is certainly a skill that takes some practice.
To finish things up, I quickly used that same small Citadel brush to add a little Werewolf Brown from Instant Colors onto whatever branches I had managed not to snap off. Those things are fragile and I freely admit there were some casualties along the way. Everything was then sealed with Krylon Matte Finish.
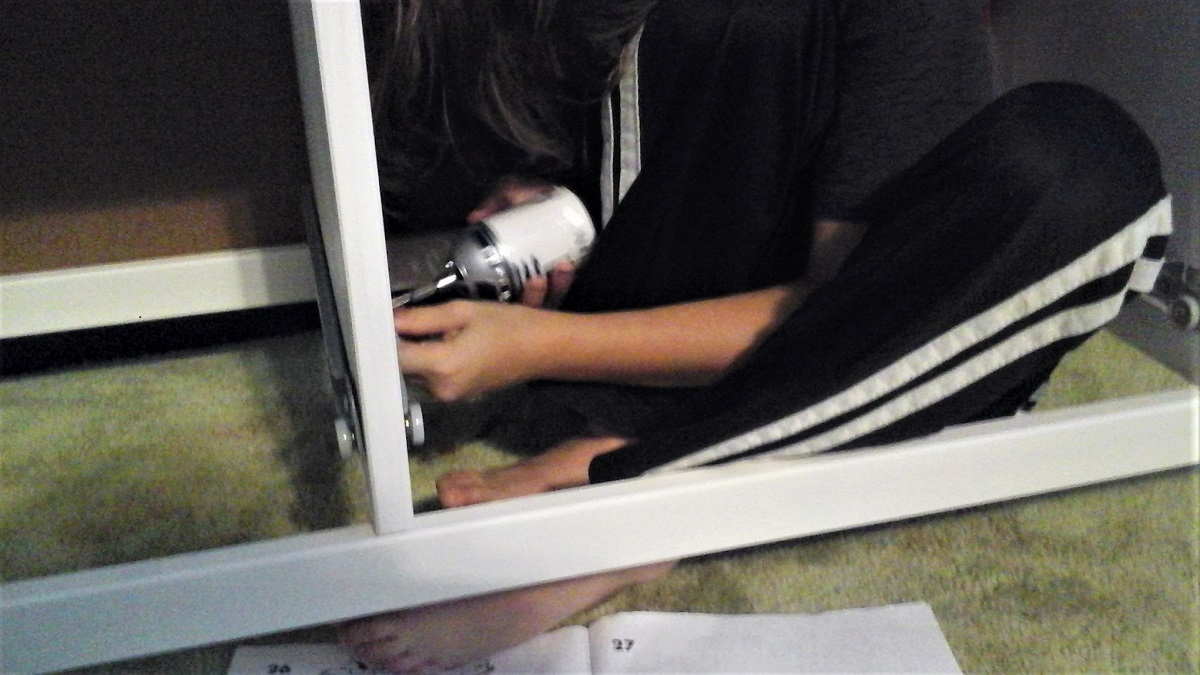
Assembly was a lot less than in my previous projects. The stream set is designed so you can rearrange pieces however you want. (And, of course, if you need extras of any shape you can just print them out.) You can either do this loosely or use the Dragonlock system. The Dragonlock system includes little Dragonbite pieces you print which allows you to lock the different stream pieces together to secure them a bit better. These connectors aren’t permanent, so you can pull the different pieces apart whenever you put them away or rearrange how their set up. Since we’re printing enough Fat Dragon Game stuff, we often find ourselves using small bits of remaining filament to just print off a few extra Dragonclips knowing we’ll find a use for them at some point.
Final Thoughts
Overall, this was probably a decent set to start learning our settings on. For painting, there are a lot of areas that stick to one color but some nice opportunities to test out some dry brushing too. I’m really liking these modular systems, though, where I can print a base set and sort of add to what we might need or design my own thing. Some friends told me Fat Dragon Games has a good long reputation in the gaming community, and I can see why. Since checking out some of the Humble Bundle sets, I have actually purchased some of their other sets too, and I foresee them being a staple in our gaming terrain collection.