This holiday and Christmas season is one where there are not only fewer opportunities to get out an purchase gifts, many of us may find ourselves with tighter budgets when it comes to purchasing gifts.
This is a reason to return to the small, homemade gift-giving traditions this year, including making use of upcycled items.
One idea I have heard about is turning old coloring pages into original embroidered and needlework designs, and the process can be as simple or detailed as the crafter wants.
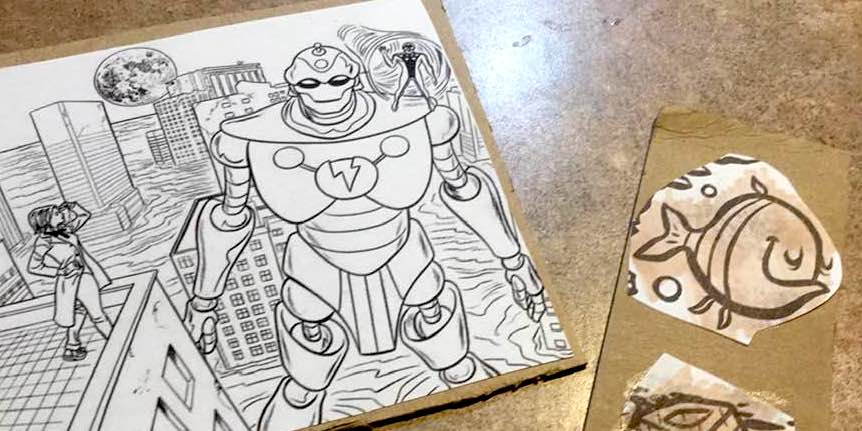
First, pick a coloring page. These can be ripped from a book or printed out, and can be as basic as you need them. If you choose one from a favorite fandom, it can turn a seemingly unexciting image into some cool and colorful fan art. If you print one out, use cardstock (if you have it) to make it sturdier, but regular typing paper is okay as well. If you want it to look more interesting, print it on light colored paper, or paint the paper with some watercolors, watered down craft paint or acrylic paint.
I found a simple fish pattern as from a coloring page on TikiTony.com, and a giant image by Mark Allred from The Quarantine Coloring Book.

Once you choose a pattern, it needs to be made a little more secure, Find a piece of corrugated cardboard and lightly glue the image on top of it. I like to use spray glue, but that can be a little messy for younger crafters. Add some double-sided mounting tape around the edges before mounting it, to make sure the edges are extra secure.
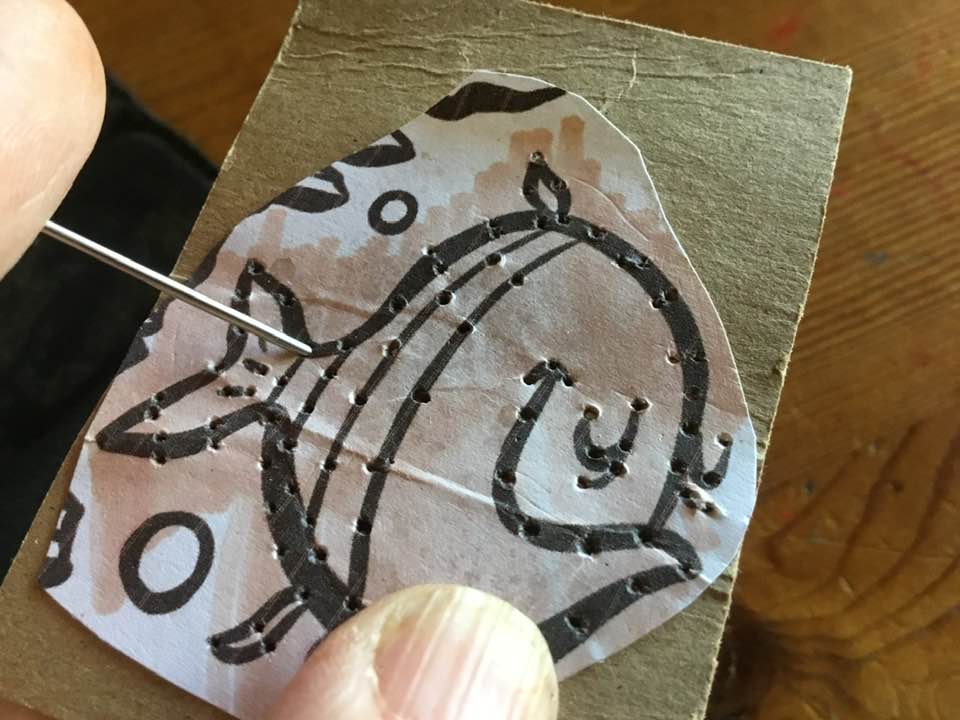
Find a large metal yarn needle (those plastic ones won’t work) or a thin nail, and lightly poke holes around the outline of the design. Don’t make them too close together. This will make it easier when you bring a threaded needle through.
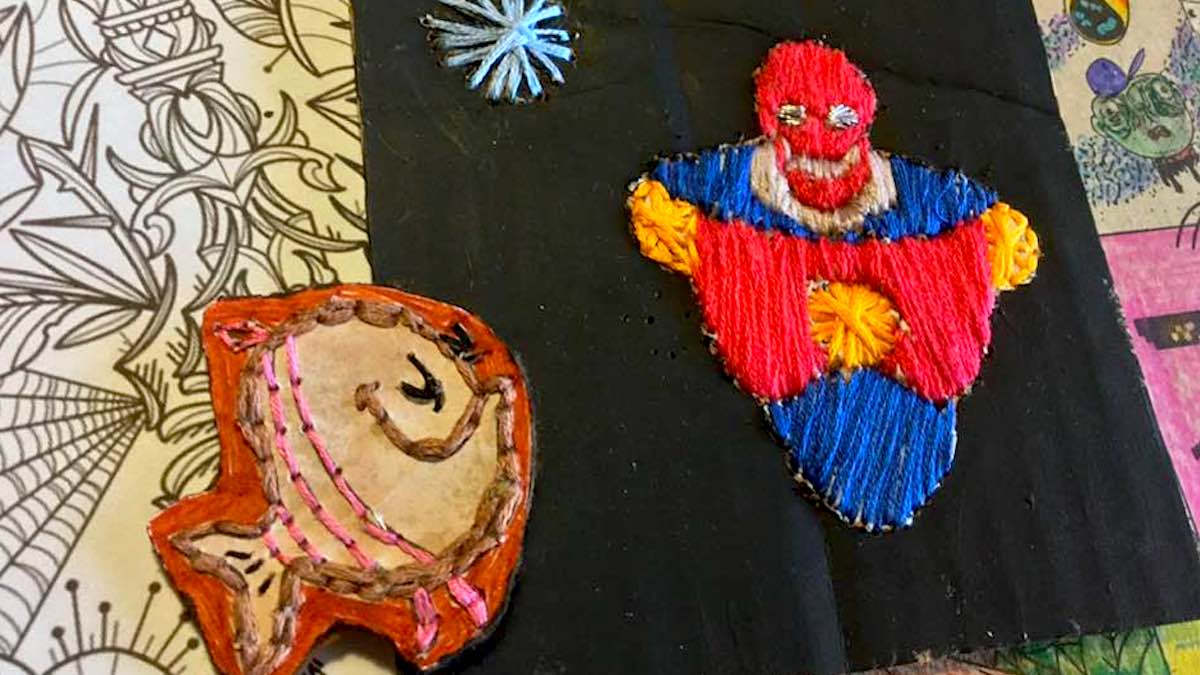
Once you have the holes punched, it is time to do the needlework, using plain embroidery thread. Start each pattern by tying a good know in one end of the thread, brining it up on of the punched holes from the back, and taping the end in place.
There are three easy ways I tried some needlework designs.
The most basic level, especially for kids, is simply following the outline of the image with a simple straight stitch or back stitch. This can also done with thicker yarn.
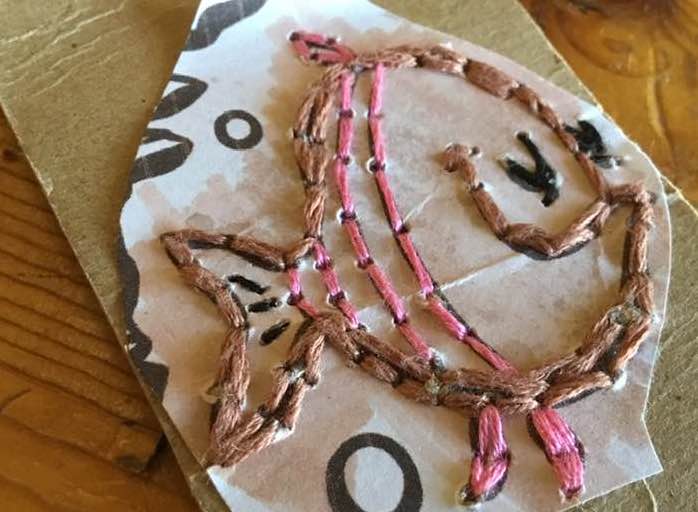
The second way, which works well with simple designs, is to make circular patterns, as with string art. This works best with round shapes in patterns.

The third is straightforward embroidery, covering the entire space with a common Satin Stitch.

On all these stitches, only stitch the areas with which you are most comfortable. Don’t feel obligated to do every little detail.
Once finished, these can be framed for fan art gifts, or you can cut out simpler images to make tree ornaments, magnets or pins.

The amount of time and detail you put into these is up to you, but the finished product is something people will appreciate as a one-of-a-kind gift made just for them.