I’ve started my Tim Burton-inspired Halloween projects this month, celebrating 25 years of The Nightmare Before Christmas; last week I built the scarecrow from his bloody tale, Sleepy Hollow, loosely based on the Washington Irving story.
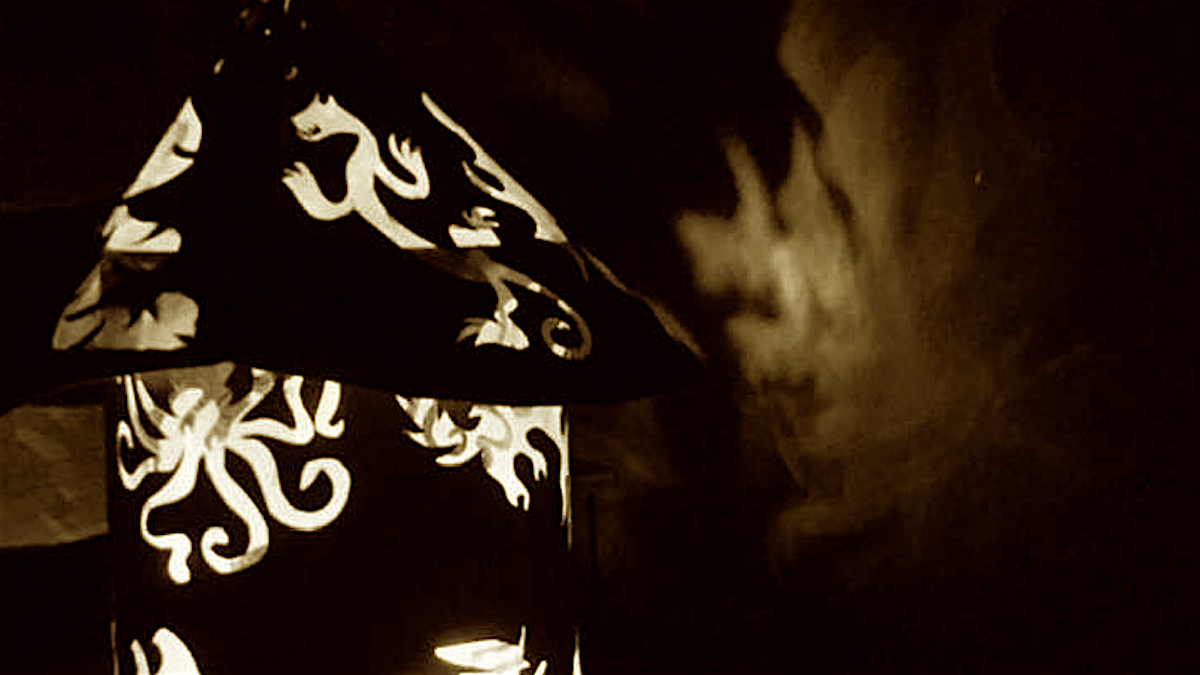
Burton’s movie is dark enough, but the poor scarecrow is even darker without some proper illumination. I didn’t want to string lights around him like my Jack Skellington scarecrow, as I wanted him to look more rustic and old. Instead I decided to make an easy light inspired by another Sleep Hollow prop: the Killian Family’s lantern.
This lantern is only seen briefly in the movie, but gives little bit of tranquility to the family shortly before their visit from the Headless Horseman. It is also one of the most Tim Burton-looking features of the film.
To make an easy paper version of this lantern, you’ll need:
- One silver poster board
- One packet of silver brads
- A good, sharp hobby knife like an X-acto (for use by grown ups, please)
- One silver or black piece of chenille craft stem
- Black spray paint
- One wooden hoop (or a key ring hoop)
- One large washer or second key ring
First, print out the templates I designed for the Lantern Body and the Lantern Top based images similar to those seen on the lantern in the movie.
For the body, trace the images twice, to make one long piece. The same images will be copied on the front and back of the lantern this way, so is you don’t want them repeated, create your on fun characters.

Use the hobby knife to carefully cut out the “creatures” on the lantern (make sure to place some cardboard under it, if working on a surface you don’t want damaged. Also, since this is made with posterboard and not actual tin, you’ll find the shapes will bulge out when shaping the lantern. A couple of pieces of self-adhesive laminate sheets on the front and back of the paper (found at school and office supply sections) will keep the shapes in place.
Once done, make a cone from the template, and hold the ends (slightly overlapping) together with brads, so it looks like an old tin light.
To make the top, cut two copies of the circle halve out of and, place them together along one straight edge with more brads. Now, bring the circle in to form a cone shape the size you want it. Cut off any access edges, and attach the other two sides of the cone with brads.

Place it over the top of the lantern body, and hold it in place with packing or duct (on the inside of the lamp). Age it a little bit with some black or dark green spray paint.
To make it hang, fold the chenille stem in half and pull it through the hoop to make a lark’s head knot Push both ends of the stem through the top point of the lantern cone, and tie them around a washer.

This will not only give the lantern some weight, but will give you place to hang the glow stick. You can also set this on a shelf or table and use a flameless candle or bright “pumpkin light.”
Once it gets dark, hang this from the arm of your scarecrow or any place you want to enjoy the shape of the lights…but don’t let the Horseman see it.
Next week: Finishing up my Tim Burton projects with a small gift idea from a completely different film.


