
Adult (or advanced) coloring books are nothing new.
Art supply and crafts shops have always had a healthy amount of intricate designs to help artists learn color and shading. DoodleArt poster tubes with psychedelic designs have been a staple at music and entertainment stores, and many biology and pre-med students have gotten a better grasp of gross anatomy and physiology with instructional coloring books.
Yet today, as with every popular trend, they are everywhere and geared toward every imaginable fandom. This means they accumulate fast. It’s never a bad thing to give people an excuse to be creative, but what the heck do you do with all those colored-in books?
Easy! Re-gift them.
Yes, this sounds pretty tacky, but it really isn’t. These elaborate, colorful pages are now ready to be used as raw materials for other small gifts and projects suitable for all ages (depending on the subject of the book, of course).
Try these three ideas that can be use for gifting anytime of year, starting with the easiest:
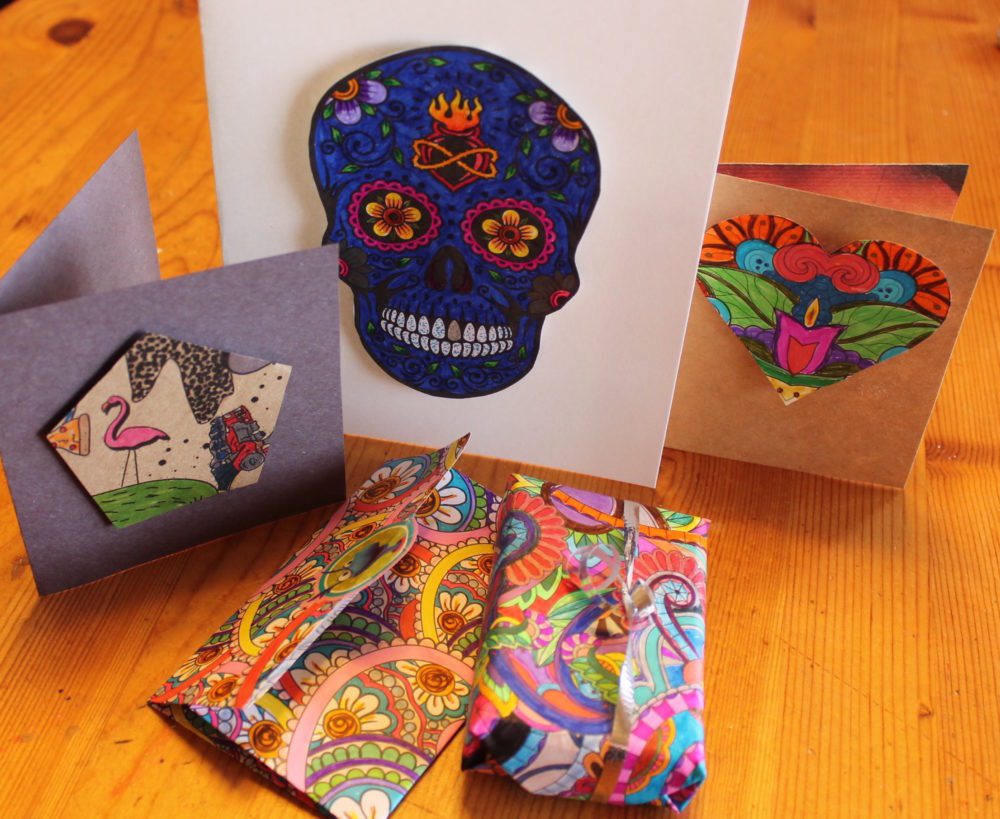
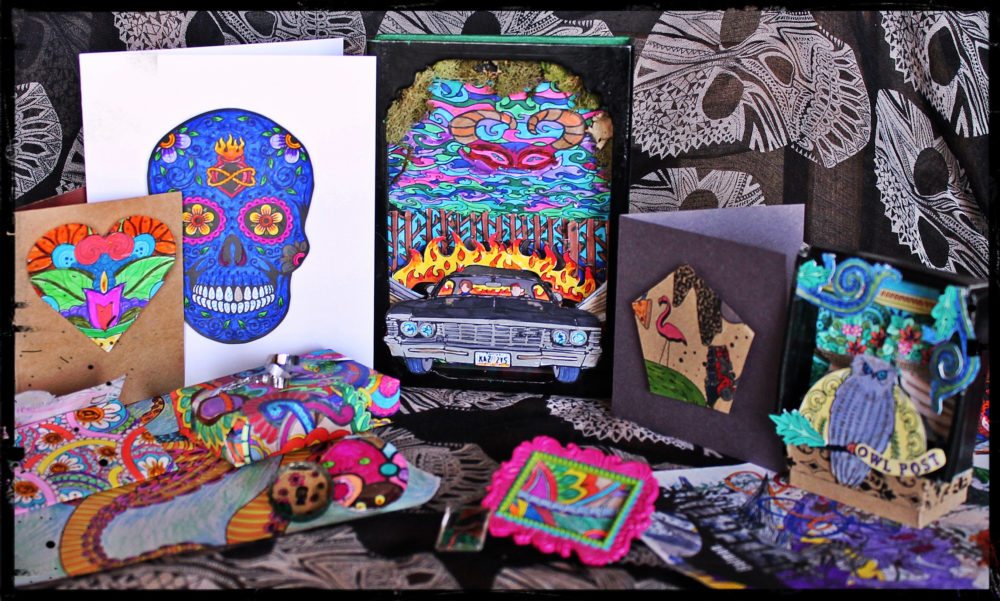
Stationary:
Color pages with blank backs make simple fold-over note cards. Cut a page in half lengthwise (so it looks like a long rectangle strip), fold it in thirds, and secure it with a single sticker. No envelope needed. Glue a small strip of white paper, or use a blank mailing label sticker for an address space, if needed. This is a fun way to send a “thank you” note to whoever gave you the book in the first place.

For birthdays, Valentine’s Day, Mother’s or Father’s Day, or other special occasions that call for cards, fold one sheet, or a half-sheet, of letter-sized (A4) card stock in half. Using a cookie cutter as a guide, trace and cut out the colored image and glue it on the front. For a more layered look, attach it with a small piece of puffy mounting adhesive.

You can even use pages as gift wrapping for smaller gifts, to match the card.
If you’re using this as a gift card or wrapping for kids, leave the images uncolored and give them with a small set of pencils or markers.

Pins and Magnets:
This is simply a modified version of the “picture” jewelry crafts that are so popular. Using clear flat glass or plastic jewels or marbles—I’ve seen them called “wafers” in some garden shops—trace the section of the image you want so it fits the glass, lightly spread craft glue or decoupage paste on the back, and place the image on so it shows through. Be careful, as images colored with markers will smear. Once dry, paint more glue along the back of the paper to secure it. Add a pin, barrette, or small magnet to the back. You can get several of these out of one image, if you need to give several small gifts.

Some craft stores have pre-done “glass dome” pendants ready for these types of projects.
You can also use bottle caps, miniature picture frames, and novelty badges to make small “coloring page” magnets as well.

Miniature Shadowboxes:
This one works best with images that actually tell a story, rather than just a mass of “zentangles” or recurring patterns all over a page.
First, find a small, shallow wooden box or a cardboard gift box like one used for jewelry.
This will take a little thinking, as you’re going to take one flat image and create little three-dimensional picture window three or four levels. Starting from the back forward, you’ll need:
• The background
• One or two “set pieces”
• The primary subject(s)
First, give your finished image a good look-over to see what you want to use where.
Next, trace the area you want for the background using the box, and glue on the inside of the box. This might take a little extra trimming, but don’t worry about the sides. It only needs to cover the background.
Last, cut the “set pieces” and primary subjects you want. You can attach the pieces to the box by folding the edges of the pieces back and gluing them on the side. You can also use puffy adhesive pieces (like the ones used in the stationary project). These can be stacks on top of each other when putting overlapping pieces in place.

Think about where you want each piece to go and glue them in the box, starting with the back most (set pieces) and the front (primary subjects) first. If you want, you can place some pieces on the front edge of the box as well.
Depending on your time, space, and skill level, these can be simple, sparse designs with just a couple of layers and pieces or more elaborate images. Always start simple.
Smaller ones are good for desktop or shelf art, but you can make more elaborate wall art with larger shadowbox frames.
Next time you acquire another coloring book as a gift, turn around and give it right back in the form of one of these projects.
It will make someone’s day more colorful.


*stationery
What great ideas! My daughter is really into adult coloring books, so we have plenty lying around. Going to show her this. I think she’d really get into making them into cards.