Every summer growing up my family and I spent at least two weeks in Southern California visiting grandparents, but I never learned about the incredible work and talent of Robert (Bob) Van Oosting and LeRoy Schmaltz, the founders of Oceanic Arts in Whittier, not far from some cousins.
For more than 65 years, this talented pair made a name for themselves among tiki- and style-lovers as “The Godfathers of the American Tiki movement,” supplying handmade pieces everywhere from private homes and commercial businesses across the country, including some very immersive experiences at the likes of Sea World and Disneyland. With this pair retiring and closing shop, and as the outdoor celebration seasons of spring and summer are blossoming, I have created a small DIY based on some of the favorite details seen in tiki bars, at Adventureland, and in beautiful retro settings everywhere: a tiki lamp-style votive.
This idea is a small, stripped-down version of the popular tiki tapa cloth lamps that often have beautiful Polynesian or similar island patterns.
The two main ingredients are patterned paper and single-colored paper straws.
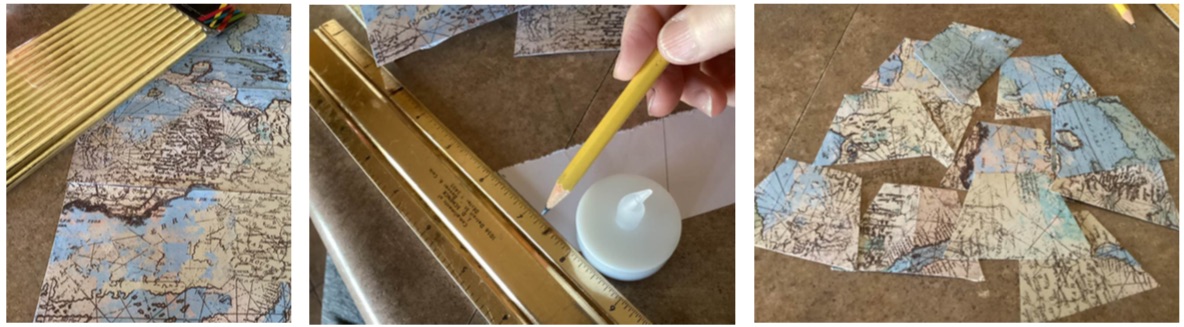
Find a piece of paper with a retro, travel, or tiki pattern you like. A sheet of scrapbook paper, a piece of wrapping paper, or plain writing paper with a favorite printed pattern are easy options.
Next, cut five or six squares or rectangles from the paper for a simple round lamp, or cut 12 trapezoid-shaped pieces for a two-tiered lantern-like lamp. Make the squares about one-and-a-half inches wide along the bottom. Make a trapezoid about one inch on the bottom and two inches on the top. Use a ruler to draw the first trapezoid, and then use the first shape as an easy template for the other eleven.
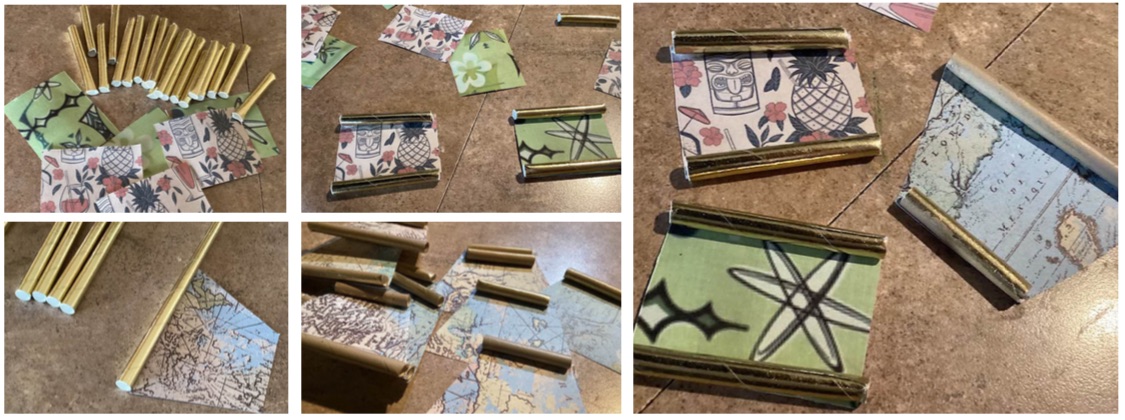
Once all the pieces are ready, cut the paper straws into the “bamboo” borders pieces.
For the square pieces, make 10 or 12 the length of the bottom and top sides of the lamp, and five or six the lengths of the sides, depending on whether you use five or six paper squares for the lamp.
For the trapezoid, cut 12 pieces each for both the short side and long side, and 12 for two even sides.
Using a glue gun, glue the straw pieces to the bottom and top of each piece. For the trapezoid, only glue the pieces on the wide and short sides of six of the shapes, and on the short side only for the other six pieces
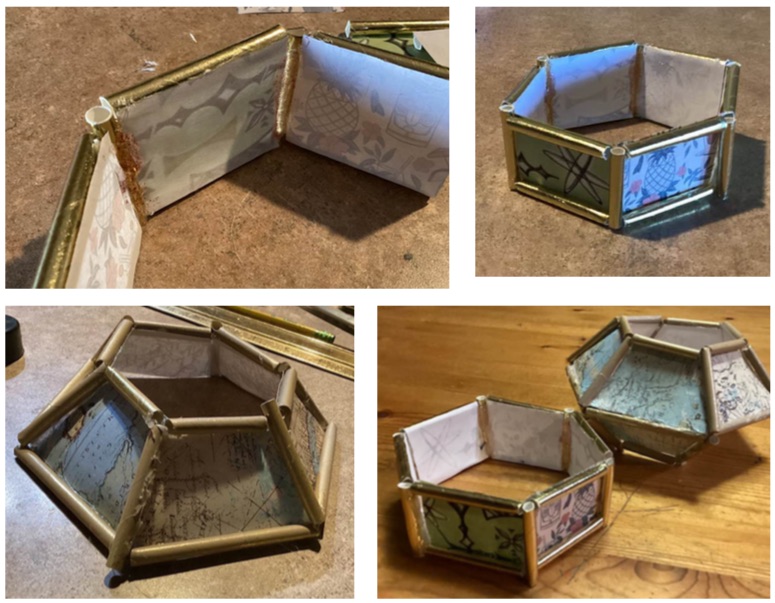
The most difficult part of this will be the final assembling of the pieces to create a lamp. The square piece lamp will be much easier to assemble, so those not wanting to take too much time may want to stick with these. For this lamp, set the lamp up as you would some playing cards or dominoes, without gluing it. This is to give you a good idea of the angle of each side corner. Then, little by little, glue a straw to each joined side. Reinforce each corner by adding a little extra glue to the seam on the inside (as shown below).
Once all the sides are joined together for the square piece lamp, the basic shape is complete.
For the two-tiered trapezoid lantern style, glue six of the shapes that have the straws on both the wide and short sides. Do the same with the pieces that only have the straws on the short side. This will give you two “bowl-shaped” halves of the same size. Glue the two wide sides together to form a lantern shape. That is the basic finished shape for the two-tiered lamp.
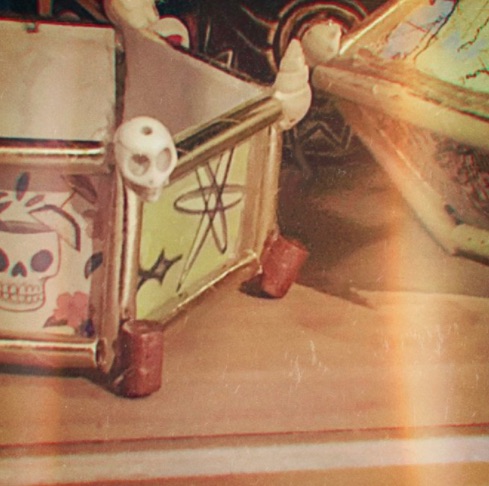
If you want to cover up the corners where the ends of the straws are exposed, you can glue wooden pony beads, small shells, or other embellishments to it for a more complete look. Place a small flameless tea candle in the center to light it.
These small votives are fun for table lights at parties, but can also be just a nice little colorful, retro touch to a mantle, kitchen bar, or patio.
The spring season is certainly not the only time to enjoy a retro or mid-century-style gathering or celebration, but it is a wonderful place to start.
This post was last modified on April 9, 2022 4:44 pm
Bring springtime and color into your home with Marimekko stationery items.
The fight between winter and the onset of spring is something we know well in…
Out today is the newest Mouse Guard book, 'Mouse Guard: Dawn of the Black Axe'—and…
If you like some extra squares in your cubes, check out the new Rubik's x…
Like many others, I jumped directly into my Apple Music Replay this year filled with…