


For those who have been fans of GeekMom for a long time, you might know that I have been in constant search of the perfect weather station and weather webcam. In fact, I have tried numerous configurations over the years to make something right for my husband’s and my very-particular requirements for a household weather station. You can see my current setup here. Tech startup BloomSky, out of Redwood City, California, has cracked the code on a compact, affordable weather station/camera combination that everybody will enjoy owning.
Born of a Kickstarter campaign in June 2014, the BloomSky SKY1 system consists of a sensor set that measures temperature, dewpoint, ultraviolet radiation, barometric pressure, and whether it’s raining or not. The ocular-looking apparatus also includes a 170-degree fisheye HD camera that will capture images every 5 minutes to stitch them into a very elegant daily time-lapse. The 2014 Kickstarter did very well and today, SKY1 customers number well over 100,000 community members in just about 2 years. This week the company’s second Kickstarter is wrapping up, having exceeded their goal eight times over with nearly 3000 backers! Their new system, the SKY2 and STORM builds upon customer feedback and presents even more sensor capabilities, along with improvements to their existing sensors.
In this post, I will first discuss the review sample of the SKY1 that I received earlier this month, then I will share the interview I had with BloomSky’s Daniel Han and James Wiles about their current Kickstarter for the much-improved SKY2 and STORM systems.
SKY1 with Solar Panel and Mounting Bracket
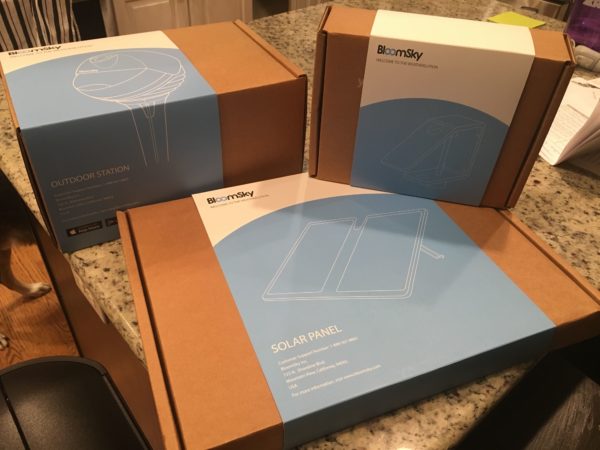
I was pleasantly surprised when I received more than just the weather station at my door. BloomSky was kind enough to include the optional solar panel and mounting bracket. It is possible to install the SKY1 system without those two other components, but I assure you, you will want both of the additions. Otherwise, you are constrained by the length of an extension cord for the always-included AC power cable, and your mounting capabilities will be limited to the included 18″ stake that can be driven into the ground. I’ll explain momentarily why I don’t care for siting this weather station that close to the ground.
I was also pleased with the relatively simple packaging as well. A minimum of non-recyclable materials were used (at least in my community, where we don’t recycle styrofoam); the very plain cardboard boxes are ideal for reuse.
Before proceeding with installation, this is the point where users should download the BloomSky app for Android or iOS. Downloading is fast and free.
So let’s talk about siting this system.

As mentioned above, most BloomSky users will want to take advantage of the mounting kit that’s available. Without the mounting kit, you’re left using the 18″ stake to attempt to keep the orb of the weather station at least 9″ above the ground. I don’t think this is good enough. While the UV, barometric pressure, and rain sensor will work accurately enough, the ground will influence the air temperature and humidity too much to produce an accurate measurement. For this reason, I will recommend the BloomSky SKY1 system (and SKY2 when it’s released) sit at least 4-6′ off the ground. I’m not the only one who thinks so. The top of many household fences will fit this requirement. Wind sensors should sit considerably higher, at least 10m (33 feet) but since the SKY1 doesn’t include wind data, it’s less important in this case.
Mounting instructions aren’t clear unless you have the solar panel. I couldn’t find very good instructions otherwise. The inside of the solar panel packaging has the two options for how to mount the SKY1 into the ground, or with the optional mounting hardware.

Our family decided to try to mount the system on the exterior of our elevated deck, which sits about 10′ off the ground. While we would have loved to have mounted it closer to our numerous other weather stations, the BloomSky weather station base units are limited by access to a 2.4 GHz WiFi connection. The forthcoming STORM wind/rain/UV unit will use RF to transmit, but the SKY1 and SKY2 need to remain within a WiFi range. This isn’t as big a limitation as one might think: in many suburban and urban areas, local cable companies are setting up hotspots and if you’re a customer of one of those companies, you could take advantage of your local “xfinitywifi” or “cablewifi” networks. However, the company has recognized that many rural areas are underrepresented due to WiFi limitations.
Regarding power, I mentioned before that the SKY1 comes with an AC power source, which limits you to about 6′ or an extension cord, unless you receive the optional solar panel. Then the only limit you have is the amount of sun available to the panel; and you don’t even need that much sun! 10-12 hours per week—per week!—is all the system needs for continuous power.
Mounting it on our deck was a fun sight to see, I was keeping my movements nice and slow so I wouldn’t accidentally drop a small screw…or a large costly solar panel…10 feet down into the grass.
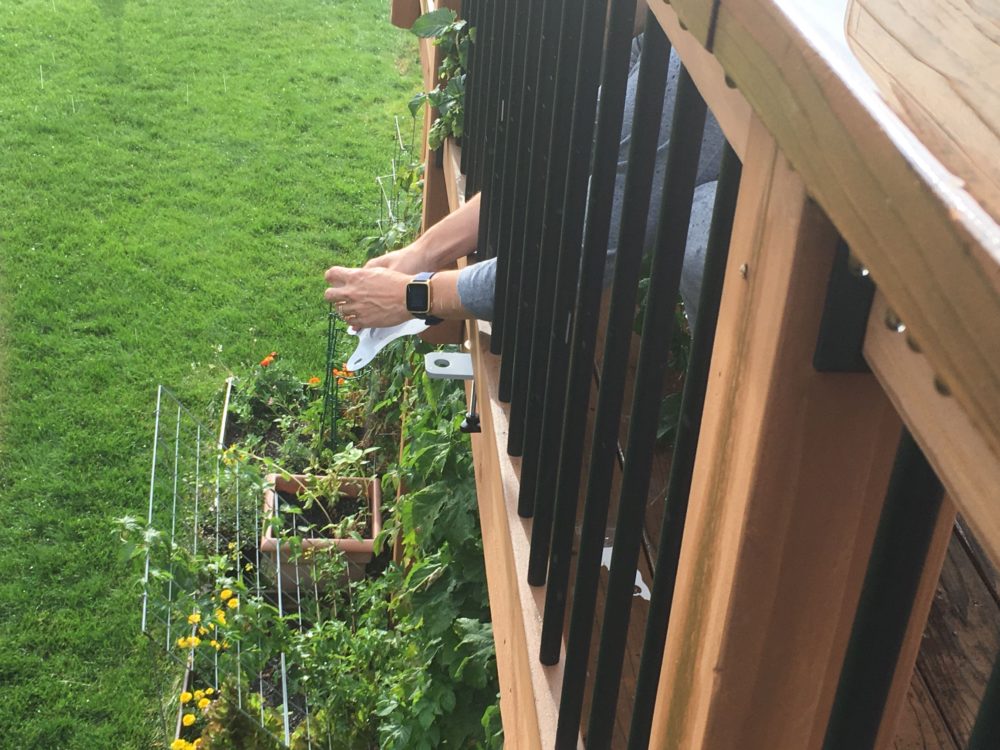


And there you have it. Installation took us less than 10 minutes, once we made decisions on how to site it properly. It only takes 3-4 more minutes to connect the system to your WiFi through the BloomSky app. Voila! Data!
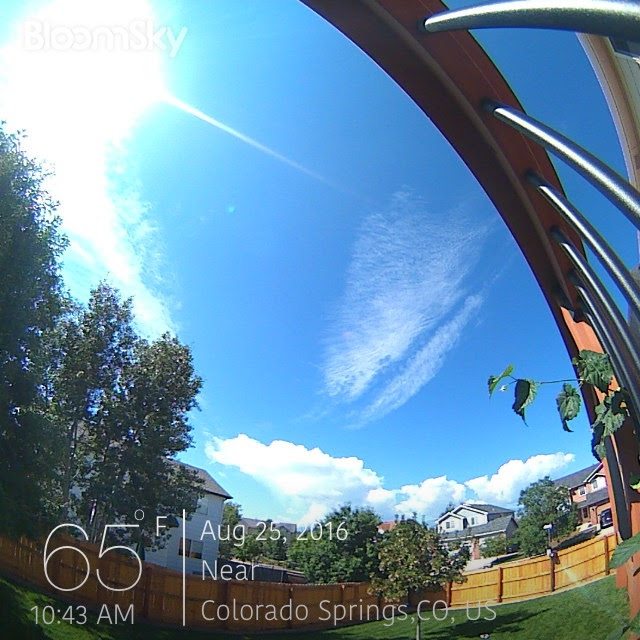
In the past, I had been constraining my weather webcam usage to indoor cameras pointing out a window. I chose this route for several reasons, from cost to fear of theft. As a consequence, we have been compromising on image quality. We finally have an outdoor camera, in the form of the SKY1’s ultra-wide angle fisheye camera, presenting clear gorgeous imagery in 1920×1072 HD. The camera will capture an image approximately every 5 minutes and save it to BloomSky’s servers. These captures will only occur from 1/2 hour before sunrise until 1/2 hour after sunset (the system is using your system’s location and elevation to gauge sunrise and sunset times). About an hour after each day’s captures, a time-lapse movie becomes available to users. Here’s one from August 28th.
Please know that SKY1’s (and soon, SKY2’s) cameras are specifically designed to view the sky. There is a little bit of adjustment capability to the camera orientation, but not a lot. Perhaps no more than about 10 degrees from the zenith. I took advantage of this capability to aim the camera away from some trees on the east side of my backyard.

Once the data is flowing, doors will open to methods of integrating into BloomSky’s weather community, as well as the social media community at large. Like most other apps these days, the BloomSky app makes it easy to Your transmitting station is visible to other BloomSky users, and the system will track how many views and “favorites” your weather station will receive. In addition, you can integrate this data with Weather Underground’s network. I have been enjoying playing with the numerous IFTTT scripts available to users, opening the door for smarthome integration. If you are a user of the SmartThings hub, there are even more capabilities! The Tweet below is the output of an IFTTT in which I push the noon BloomSky image to Twitter daily.
#BloomSky picture for August 28, 2016 at 11:58AM for AustinBluffs/Woodmen pic.twitter.com/05TU0hqEqW
— Patricia Vollmer (@vollmerdp) August 28, 2016
Summary
In summary, here are the pros and cons of owning a BloomSky weather station. Hang tight as the new SKY2 and STORM models come on line this fall and winter, but you’ll find many of these features I liked about the system will only be improving.
Pros
- Cost. At MSRPs of $200-300, depending on whether you include the solar panel and mounting brackets, the quality of the sensor and HD camera is incredibly affordable, compared to what our family paid for our separate weather station and camera components.
- High quality imagery. There’s no doubt that for many users, the integrated imagery is a crucial selling point. Users are mounting these systems at their second homes to help monitor the weather from afar. The imagery is stunning and make monitoring the weather from afar fun. However, I will mention in the “cons” section a limitation I found.
- Accurate weather details. Based on comparisons with other weather stations, I have been pleased with its relative accuracy (there are biases among my home weather stations, likely due to proximity to my house, fence, and the street). While I’ve only had this running for about a week, I hope that the system is durable enough to handle its first Colorado winter, which is coming soon.
- Ease of installation. Unlike the Davis systems we have installed in the past, the BloomSky has numerous options for installation. The SKY2 will be including tripod and U-bolt mounting. If everything else seems too difficult, mount it to the 18″ stake and simply stick it into the ground.
- Smart Home integration. If you are well-versed in Smart Home technology, BloomSky is continuously finding ways for its systems to “talk” to other components. From its IFTTT recipes to its adaptability to the SmartThings and Nest hubs, it won’t be long before you’re using hyperlocal weather measurements to control lights and thermostats.
Cons
- Reliance on WiFi for data transmission. This isn’t just for installation. The SKY1 and SKY2 systems need WiFi to transmit the data to its home server in California. The system requires 2.4 GHz WiFi, in fact. Anything older or newer and you won’t be able to communicate with the weather station. When I asked about this, the company made clear that 2.4 GHz is the most stable, and to add additional capabilities would take additional space and weight. Understandable…and I think they did a good job making this clear to customers. The company also recognizes that not all communities have robust WiFi to handle the SKY1 or SKY2 systems.
- Lax guidance for where to place the system. The company is recognizing the need to be a bit more stringent about where to place the system. Hopefully they’ll have some clearer guidance when the SKY2 and STORM systems come out. They plan to start quality-controlling the data to help flag what’s coming in from poorly-sited systems; this will be important for some of BloomSky’s future endeavors. I will continue to recommend that the SKY1 and SKY2 needs to be at least 4′ off the ground, and the upcoming STORM system should ideally be at least 10′ off the ground, preferably 30′ high.
- Camera limitations. I mentioned above that the camera is meant to look up at the sky and there is a little bit of adjustment capability to get obstructions out of view if need be. To keep the system as simple and lightweight as possible, there is no means to minimize condensation on the camera lens. If you live in humid locations, morning dew on the camera lens will be a very real frustration. As of now there are no moves to install a heater to mitigate this, so be prepared for many hours of blurry images in the morning.
The BloomSky SKY1 system is available at an MSRP of $219. This is the all-inclusive version, which I highly recommend. It includes the solar panel and multi-functional mounting bracket that works on decks and vertical surfaces alike. It is possible to configure the unit without the solar panel and mounting bracket, which can save money.
While yes, you can buy a SKY1, I will recommend holding off if possible for BloomSky’s SKY2 and STORM systems, which should be available to the public by the end of 2016. The first models for their Kickstarter backers are rolling out in the next couple months, and I had the chance to talk to Daniel Han and James Wiles of BloomSky about the exciting improvements that are coming with their newest system.
Interview with BloomSky’s Daniel Han and James Wiles
Daniel Han is BloomSky’s Director of Growth Marketing & Communications, and James Wiles is the company’s Chief of Customer Service. The two together took time this past weekend to speak to my husband and me about the exciting changes coming with the SKY2 and STORM systems.
Patricia Vollmer: Tell us more about the SKY2 and STORM Kickstarter.
Daniel Han/James Wiles: The SKY2 and STORM systems are incorporating over two years of customer feedback. Unlike the SKY1 which only recorded imagery, temperature, dewpoint, UV radiation, barometric pressure, and whether or not it’s raining (in the form of a moisture sensor), the SKY2 and STORM systems together will be adding wind speed, wind direction, and rainfall total to the suite of available data. The UV sensor is moving from the SKY2 to the STORM to help keep it upright (on the SKY1 the UV sensor is adjacent to the camera lens, which means it can tilt away from the more-accurate straight-up orientation).
While the SKY2 will feel very familiar in terms of installation and WiFi connectivity, the STORM will be able to spread its wings a little with RF communications, giving it a 100 yard range to a receiver that connects to your home router. The STORM’s installation will be made easy with a bubble gauge and direction indicator to help the wind direction measurement be as accurate as possible.
In addition, more options will be included for installation, to include a U-bolt capability that will help it attach to a fence post or pole, as well as a tripod option. These will be additional costs, unless you take advantage of one of the Kickstarter promotions that will include the mount and tripod at no extra charge.
There will be a great package available, which will be called the SKYPRO, consisting of the SKY2 + STORM + 2 solar panels + a mount at a single price (MSRP $299). [As of this writing, there are still Kickstarter rewards available that can get you this set at a much lower cost.]
It needs to be pointed out that the STORM is available separately, but there needs to be either a SKY1 or SKY2 through which the STORM needs to communicate. Please don’t buy this product alone otherwise.
PV: Since I have a SKY1 already, I think I’d just want to get a STORM. Is there a reason why someone would want to go “all in” for the SKY2 + STORM instead?
DH/JW: The SKY2 will have several improvements, based on customer feedback. There will be sensor improvements in both precision and ranges of values. In addition, the built-in ventilation system has improvements to contribute to more accurate temperature and humidity measurements. The relocation of the UV sensor will provide for a more accurate measurement, and finally, the introduction of Bluetooth connectivity for smoother installation.
In addition to the hardware improvements, coming out at the same time will be some important back-end improvements. For example, we are about to roll out the ability for a hard reset from the backend. All systems will have a firmware update pushed that allows for this capability, and the new SKY2 systems will have this as they ship out this fall. We are also introducing a new user dashboard, presenting new ways to manipulate your data and imagery.
PV: Accurate placement of a household weather station is something very important to us. How do you know to trust a system if it’s been inaccurately placed? I feel that your guidance should be more stringent.
DH/JW: We understand that placement is important and that’s a valid concern. That being said, some customers find that the SKY’s camera and imagery capabilities are more important than the weather data. These are still valued members of the community, so we are currently looking into quality control methods that would allow us to incorporate siting information with the weather data a particular weather station reports. Conversely, we are looking into a method to profile those SKY systems that are properly placed: we can better trust their data.
PV: I love the fisheye lens camera. Can you tell us more about that? What inspired your company to use a wide angle lens?
DH/JW: That was J.T.’s idea [J.T. Xiao, founder and CEO of BloomSky]. He felt that traditional camera would provide too “flat” an image. To truly see features traverse across the sky, the fisheye lens would allow a feeling of the dome-like nature of the sky.
We have some great things brewing with those images, by the way. We are looking into a predictive capability using the images. For example, if we know that rain begins X minutes after a cloud feature marches across the screen, could that be incorporated into a rain forecast?
PV: One of the IFTTTs I’ve been writes each data capture to a Google Sheet. I really like this one, and I noticed that each and every image capture is also being saved to your company’s Google Cloud. Are you really saving everything? I’m trying to wrap my head around how much data that will become as your customer base grows and you maintain all this data!
DH/JW: Yes. We are saving all of it! Not saving nighttime imagery helps, but we still receive about 40 MB per day per customer [as of this writing, BloomSky has about 100,000 weather community members]. We have recently exceeded 100 million data points, in fact! We have some ideas on how we’d like to use this data to come up with our own forecast model that would be visible to our community members through the BloomSky app. We feel we could use our community’s neighborhood weather stations to produce a more-local short-term forecast for our BloomSky users that would be better than the in-house weather apps resident on popular smartphones [Author note: The iPhone’s Weather app uses data from The Weatther Channel]. Preliminary testing has already shown a 27-33% improvement in accuracy using the weather station data, when compared to the larger-scale weather apps, such as AccuWeather and The Weather Channel. They don’t have the same access to this hyperlocal data that we would.
PV: I’m looking forward to seeing that feature in my own app really soon. Is there anything else our readers would want to know?
DH/JW: We’d like to point out that we have a lot of support on our Kickstarter page from customers in Australia and we are looking forward to seeing our network grow there. We are at $635,000 of an $80,000 goal [as of this writing, they’re at nearly $670,000!] and we are very grateful.
Also, we are proud that the CALFIRE network chose to invest in our SKY1 systems to help monitor wildfires here. In fact, we’ve seen instances where the SKY1 captured new wildfires on the camera.
Just 2 days after setup @CALFIRE_SLO was able to catch smoke from vegetation fire near Paso Robles, CA. Be safe! pic.twitter.com/95H3GTvfu3
— BloomSky (@bloomsky) August 15, 2016
Finally, we’d like to mention our community outreach program. Public schools and national parks worldwide are eligible to apply for one of 500 BloomSky SKYPRO systems that the company is giving away to help spread the love of meteorology and enhance the BloomSky weather community. Recipients will need to pay for shipping. Systems will ship at the end of November. We have done this on smaller scales and the program has been very successful. If you know anyone who might want to apply, direct them to our application page on our website.
**********************************
To sum up, the BloomSky SKY2 and STORM Kickstarter campaign is running through 1:00 pm PDT on Tuesday, August 30, 2016 (yes, I know that’s really soon!) After the campaign wraps up, Kickstarter backers will receive SKY2 and STORM systems in September and October 2016, and systems will be available for sale to the general public by the end of 2016.
If you are dying for one of BloomSky’s systems NOW, the SKY1s are available through the company’s website and Amazon at MSRPs of US $179 – $219.
GeekMom was provided a complimentary sample of the SKY1 weather system, mounting bracket, and solar panel for purposes of this review. As always, all opinions are my own.


I’m a backer and can’t wait to receive the SKYPRO station. However I’m completely the opposite of the user Daniel and James alluded to. The camera is way down the list of my wants. I want data and consequently I’ve been wracking my brain trying to find the perfect spot for installation. Open, southern exposure, and good wifi reception believe it or not is a fairly tall order.
I understand completely Joel. It wasn’t easy to find a spot that worked at our house, and I’m not 100% happy with the deck spot, but because of the WiFi constraints, it’s what we’re dealing with. It turned out to be a pretty nice spot for the camera, though. Thanks for reading!
Very interesting post the pros and cons of owning a BloomSky weather station.
Thanks for reading Chris!
Looks like a great unit to monitor and share the current climate engineering operations
that are present in our skies daily.
SKY1 unit has an optional solar power amazing work and useful.
https://vimeo.com/worldpatentmarketing
Thanks for reading: but that’s what I have pictured, yes? The solar panel? See the first photo in this post.
Greetings from a chilly Canberra
I have just ordered a Skypro Kit that includes the main sensor and their new wind & rain sensors – both with solar panels.
I obviously face a few challenges in regards to mounting locations for solar and wifi access but I was wondering if you could guide me towards a good resource to hook the system up to my Thingspeak channel? I currently monitor my rainwater (search for tag “watertenk”) on it but must admit that my skills at setting up the system are fairly basic and the Matlab guides are not terribly helpful for an amateur Geek like myself
Hello Thinus,
Greetings from Colorado! I’m afraid I can’t help with integrating with the Thingspeak channel. I’m not as smart with Matlab as I should be….
We are about to buy the rain/wind sensor set for our own BloomSky here…
https://www.wunderground.com/personal-weather-station/dashboard?ID=KCOCOLOR618
Thank you so much for sharing this amazing information, please keep sharing…