This Halloween, we finally decided to purchase some full-sized plastic skeletons. However, we wanted to make sure ours were just a little different than others.
Last week I shared how we turned one into my oldest daughter’s favorite book character, Skulduggery Pleasant, but I wanted to be in charge of giving this second bony friend its personality.
I wanted my skeleton to come with its own video game Easter egg so everyone can enjoy it, but those “in the know” will get the reference. I wanted a fun, spooky skeleton that isn’t gory but is still cool. I also wanted a fun horror reference, too boot.
There’s one guy who checks off all these boxes: a “Deadite” soldier circa the Evil Dead franchise’s Army of Darkness, as seen in both the movie and the recent horror video game, Evil Dead: The Game.
Plus, he was really fun to make and wasn’t too scary for younger visitors.
Like our Skulduggery, he needed a good outfit, but the armor in the game is a little beyond a weekend project for many families.
I settled for a Harryhausen-style fun skelly, more in the spirit of the original film movie. I made sure to include a more recent Easter egg.
Here’s what I did:
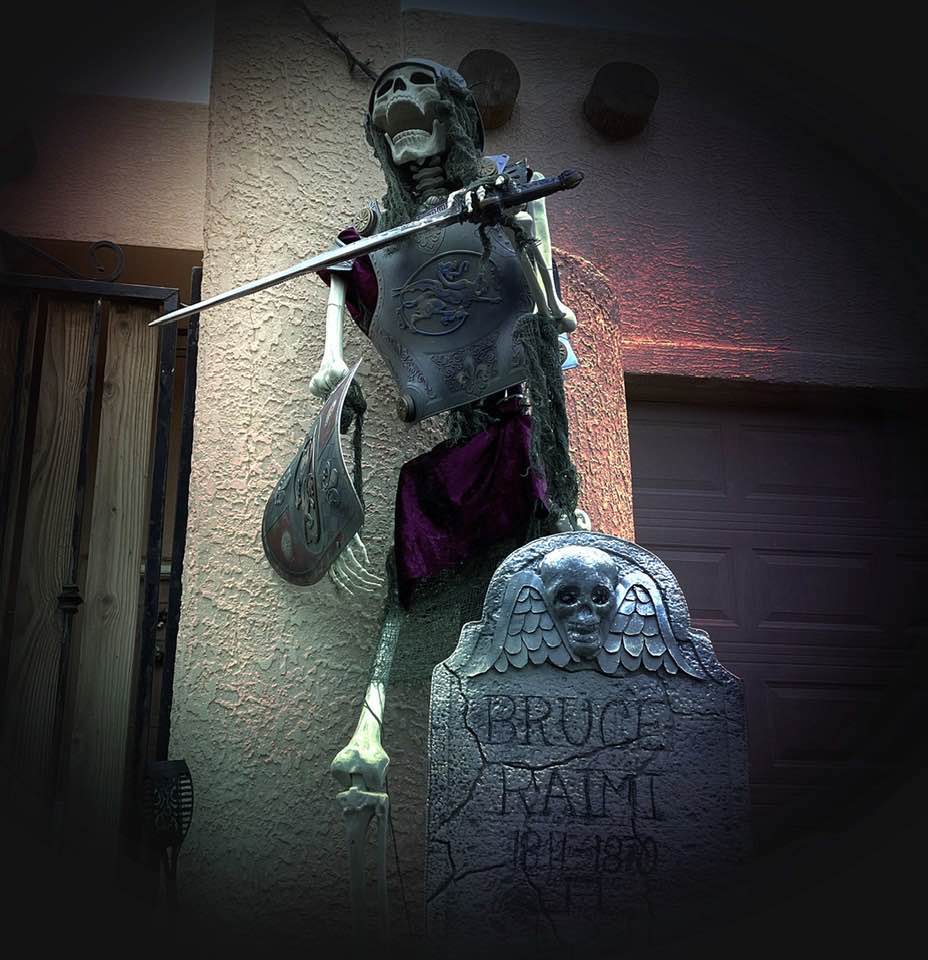
I used kids’ armor. My poor skeleton was a couple of inches shorter than me when he was standing, so I knew any big costume armor would swallow him up. I found a $20 set of kids’ armor with a helmet, chest plate, shield, and sword. These plastic pieces look as cheap as they are, so I aged them up a bit with some spray paint and acrylic paint. After that, they looked a lot more aged and beat up.
I gave him some “cloth” chainmail. Chainmail is a little heavy and expensive, but some black or dark green colored stretchy cotton cloth used to decorate homes works well. We found something called “Halloween Creepy Cloth” at Party City for three bucks, but this stuff is available everywhere from dollar stores to Halloween superstores. It is always pretty inexpensive.

I cut some of the cloth into a strip and used a glue gun to attach it to the inside of the helmet. I cut a hole in another piece big enough to go over his skull and hung it over his shoulders like a poncho. I tied the rest around his waist (or where his waist would be) like a sarong.
I found some leftover velvety material from a past costume project and made a similar poncho and sarong big enough to cover him, but not so big you can’t still see the “chainmail.”
Once the cloth elements were in place, I tied the armor on tightly with both the straps provided in the kids’ costume kit, zip ties, and bits of cloth. The cloth was the best way to keep the sword in place, as it doesn’t stick out too much. The helmet’s little strap was just the right size to fit under his chin, so I lucked out there.
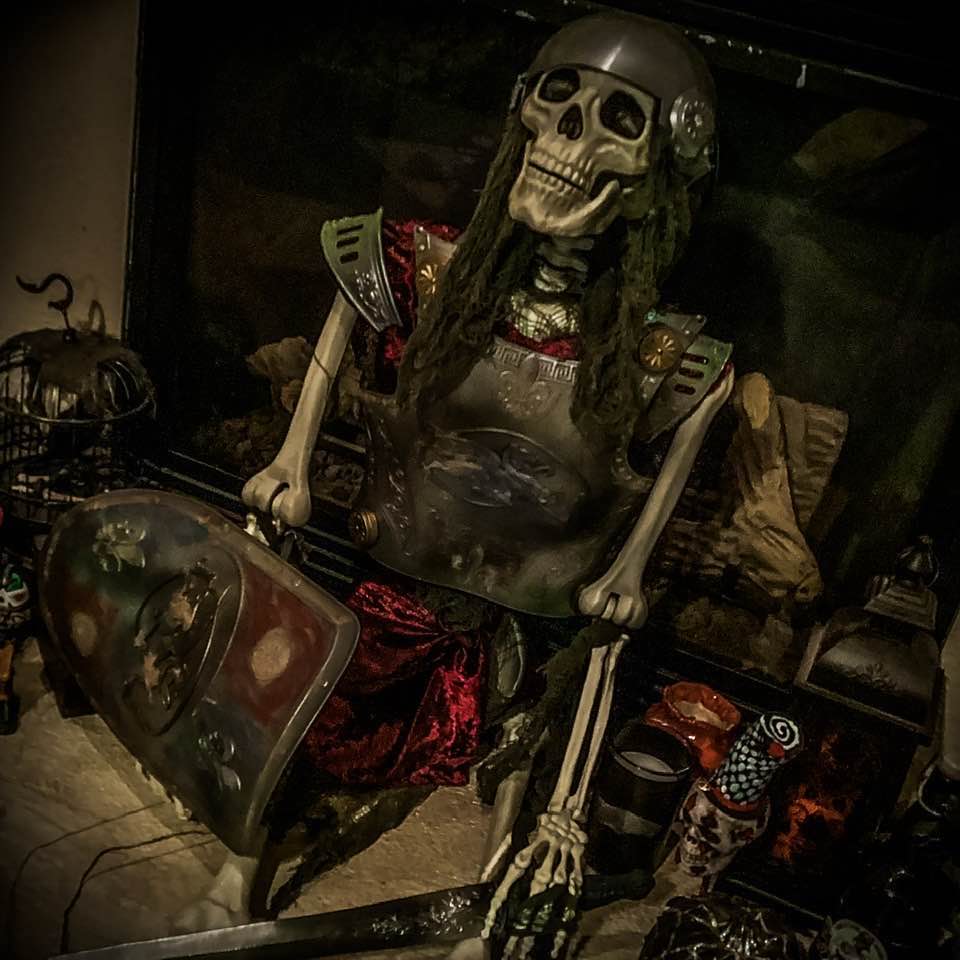
I displayed him by hammering a broomstick into the ground and using a couple of zip ties around the spine to hold him up.
My Deadite was done, but what about that Easter egg? This was the final addition.
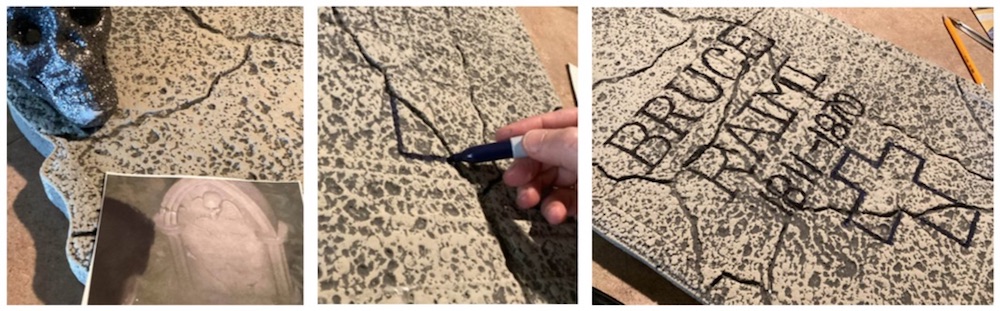
Make a “Bruce Raimi” grave. In the game, you can come across a grave marked “Bruce Raimi,” a shout-out to the director (Sam Raimi) and star (Bruce Campbell) of the Evil Dead movies. Making it isn’t too hard if you can find a nice styrofoam grave as a template. I found one at a home improvement store that was under ten dollars and had very little design on it. I used a felt tip marker to gently carve the inscription on the grave:
Bruce Raimi
1811-1870
Underneath it, I drew a plain cross to match the design on the grave.
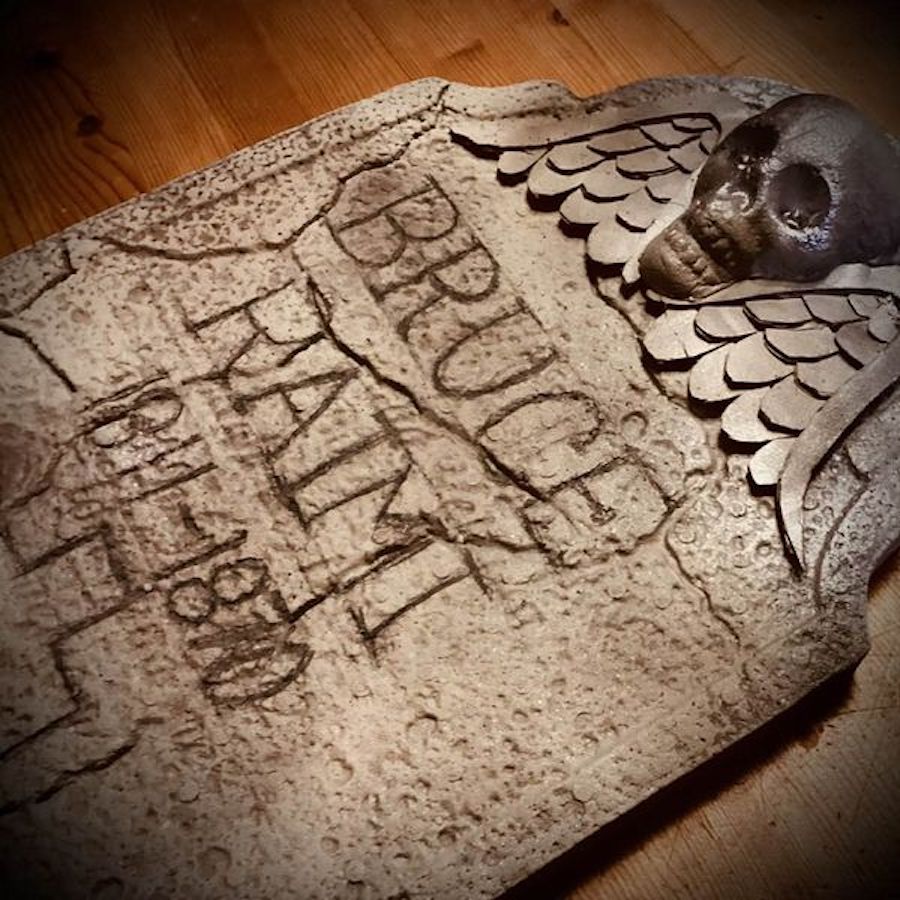
For the ornamental design on the top of the grave, I found a small styrofoam skull and cut it in half. I used corrugated cardboard to make a set of wings with a similar method I used to make some plague doctor staff wings I created two Halloweens ago. I just adjusted the wing shape a little to look more like the design on the grave.
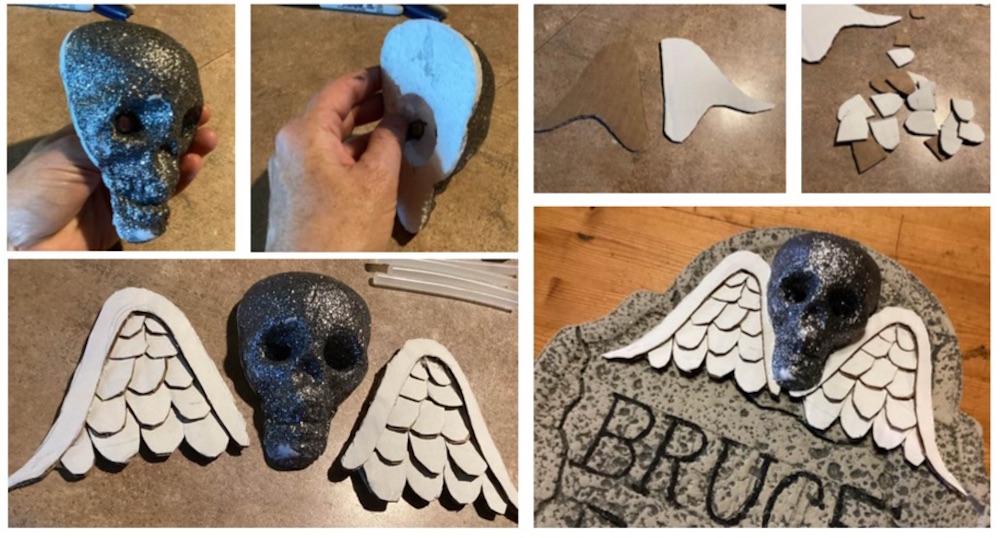
I glued the wings and skull in place with a glue gun, then went over the entire grave lightly with a few strokes of gray spray paint. This would give the entire grave a consistent color.
I placed the grave in front of the Deadite with the stakes provided with the original grave, as well as some heavy rocks on both sides. It can get windy where I live in October.
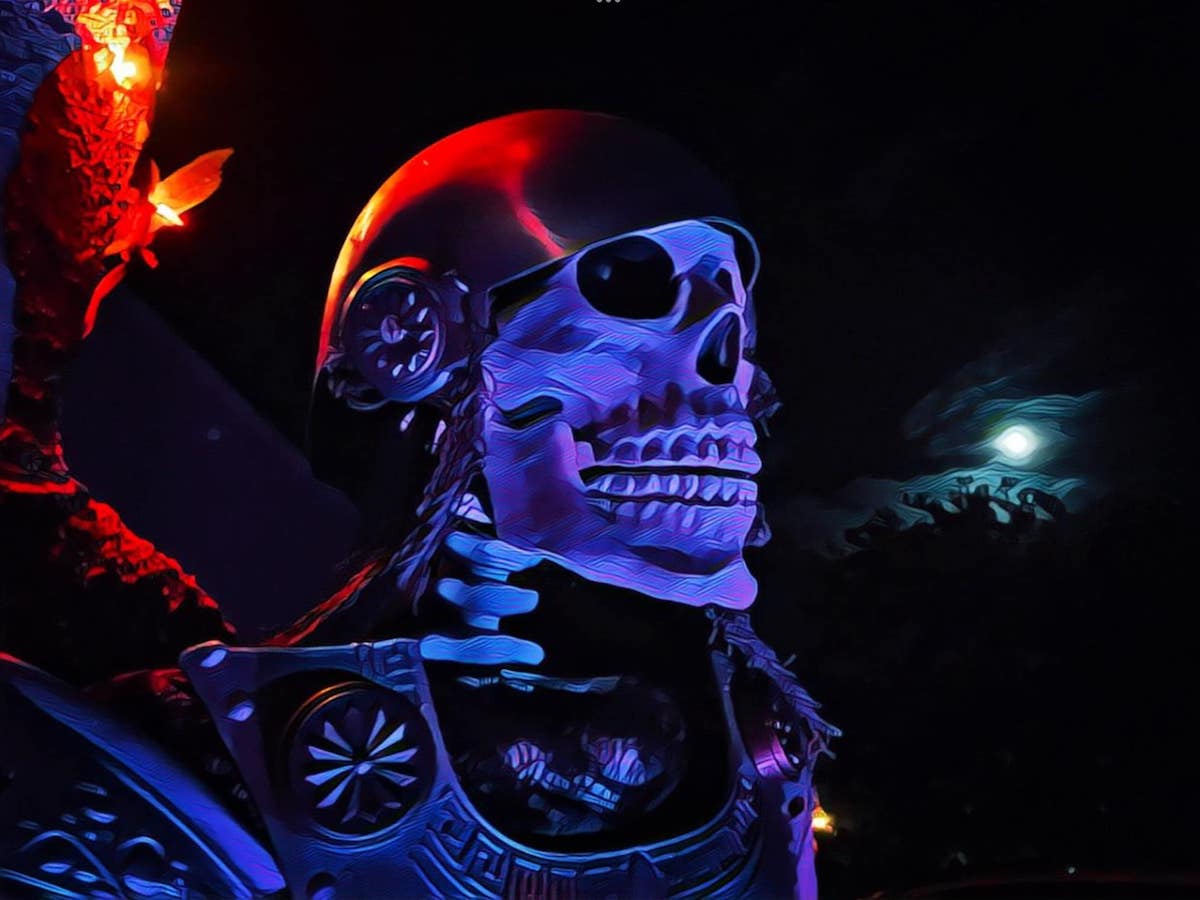
I used some solar spotlights of different colors to illuminate the grave and Deadite at night. This way, he can look good all night guarding our house or welcoming guests.
The final result is a cool, one-of-a-kind display that is fun, spooky, and very… groovy.