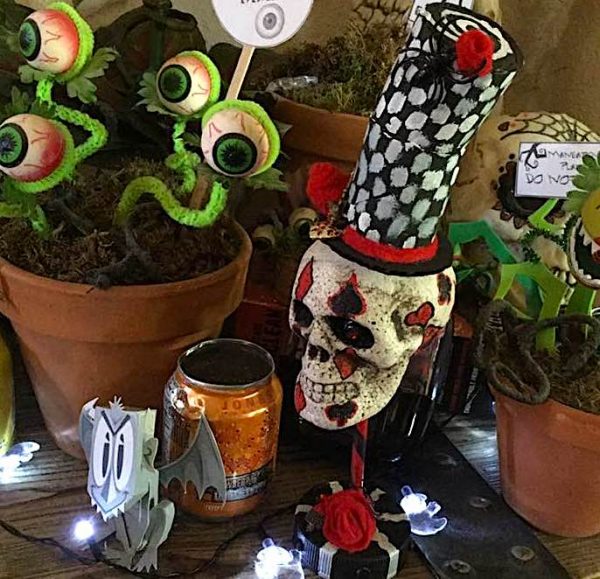
With some Halloween events returning this year, there are more opportunities to create a fun table centerpiece or mantle decoration to celebrate the season: a fancy and formal, “dapper” skull.
This idea is based on many decorations I have seen in catalogs, artist sites and markets, and with some retail Halloween décor. Many of these cost at least $20, with a few of them listed much higher.
I wanted to try one of these that can come in easily under $10.
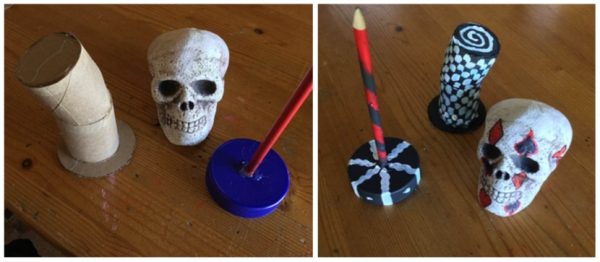
You’ll need a small Styrofoam or plastic skull, plastic jar lid (like one on a peanut butter jar), pencil, bathroom tissue roll, and a small piece of cardboard.

For the base, use an utility knife of drill to make a hole in the middle of the plastic lid. Have this part already done if working with younger crafters. Poke the pencil in the in middle so the end is even with the base, and use a glue gun to adhere it to both sides of the lid.

For the hat, cut two circles (one a about a half-in diameter larger than that or the roll, and one the same size of the roll. Cut a couple of slots in an “x” shape in the middle of the larger piece of cardboard so it will fit better when placed on the skull. Glue the roll on the top of the larger disc, and paint it how you want of an easy stovepipe hat. Finish the top end of the hat off with the second smaller disc of cardboard. If you want the hat to look bent, cut an incision nearly through the entire roll, and glue the “gap” together (as shown below left).

Paint the base, skull, and hat pieces however you want. It can look like a masquerade mask, a Day of the Dead calavera, steam punk skull, gothic, or anything you want it to be. I made a weird Mad Hatter or circus ring master.
Once the pieces are painted and done, use a glue gun or modeling adhesive to glue the skull to the top of the pencil (which can be poked into the skull to keep it secure), and glue the hat to the skull.
Guess what? That’s it for the basics.
Any other embellishments you want add to this are up to you, but I suggest having fun looking through what you might have at home.
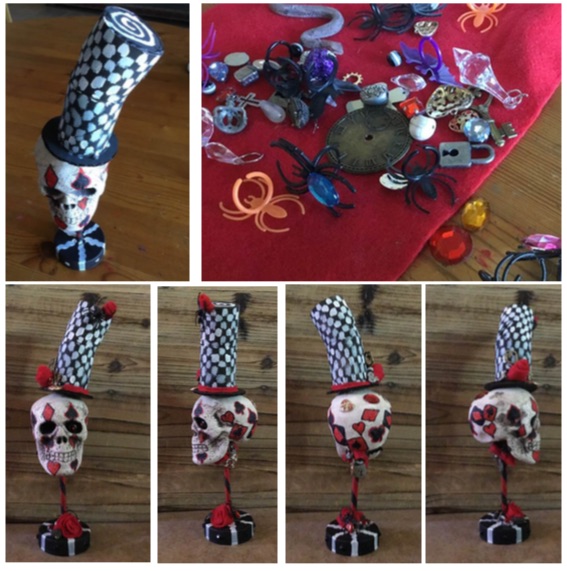
For example, you can use ribbons, cloth scraps, pony beads, old unwanted costume jewelry (or carnival beads), small nuts or washers, silk or plastic flowers, yarn even thin strips of scrapbook paper.
Little by little, as you add items to this, it will begin to really look worthy of a special, spooky celebration..
Set these in the middle of a table, on a shelf, in a window for people to see, a fireplace mantle, or anywhere that needs a fancy, happy Halloween season smile.
Even if your plans consist of just family, it can still have that festive, party touch without spending too much money.