Now that the new Cricut Maker has alleviated some of my fears about cutting with something other than simple card stock, it was really time to dive into the deep end with the Cricut Mug Press. As a lifelong tea drinker, and a naturalized coffee junkie, I have a lot of mugs. A lot. My preference is typically a line that Disney started creating in the ’90s, or anything coffee shop themed. My weakness is a nice shaped mug, with a good handle, and an even better pun. I just can’t resist. With the Cricut Mug Press it is entirely possible that I may end up with a Cozy Cone Coffee cup, fill her up, Sally!
Released this spring, the Cricut Mug Press already has an insane amount of how-to videos, project suggestions, and aficionados online. A quick Google search left me excited and overwhelmed by the possibilities. I decided to put all my glorious ambition aside and try one of Cricut’s standard projects first. Not something I would choose for myself usually, but if I want to do all the things I’ve seen, then I want to really grasp the basics before I get muggy with it.

Pulling up the project on Cricut Design Space is easy. Harder is ignoring the plethora of more complex projects on offer alongside the basic cut, but I had committed myself to mastering the Monogram cup. My kids and I have been watching YouTube videos all week from all different crafters; some of them are not very helpful, but there are a few diamonds out there. A few I found to be really annoying, but went back to time and again. Schmaltz aside, you just couldn’t fault their advice and tips. Just because someone isn’t your cup of tea doesn’t mean they don’t make a really good cup of tea. It was one of the schmaltzy videos that gave us a description of the application process that finally “sunk in” with my son.
Cricut smart cutting machines have been used to make personalized mugs for years, all with a wide variety of vinyl transfer. But the Cricut Mug Press puts aside everything you knew about vinyl with the use of Infusible Ink, in both sheet and pen form. A lot of crafters wax poetic about the difference between vinyl and Infusible Ink Transfer Sheets, but at a basic level it is actually pretty cool. Where the vinyl sits on top of the surface, with infusible ink and a Cricut Mug Press the ink is heated up to the point that it converts back into a gaseous form. The ink is then infused directly into the material itself instead of onto the surface. This makes it far more long-lasting than regular vinyl projects, makes it dishwasher safe, and gives you a much more professional looking finish. My entire family was amazed with our finished product.

As it turns out, remembering the password on my laptop was the most enduring complication to overcome when making a mug. Setting up your Cricut Mug Press is ridiculously simple. It comes packaged as if it were intended to be an addition to a NASA project, and is so satisfying to rip into to activate and start using your press. There are really only a handful of steps beyond unboxing.
- Connect the power cord between Cricut Mug Press and outlet.
- Connect the USB cord between Cricut Mug Press and laptop.
- On the navigation page in Cricut Design Press select New Machine Setup, Heat Press, then Cricut Mug Press.
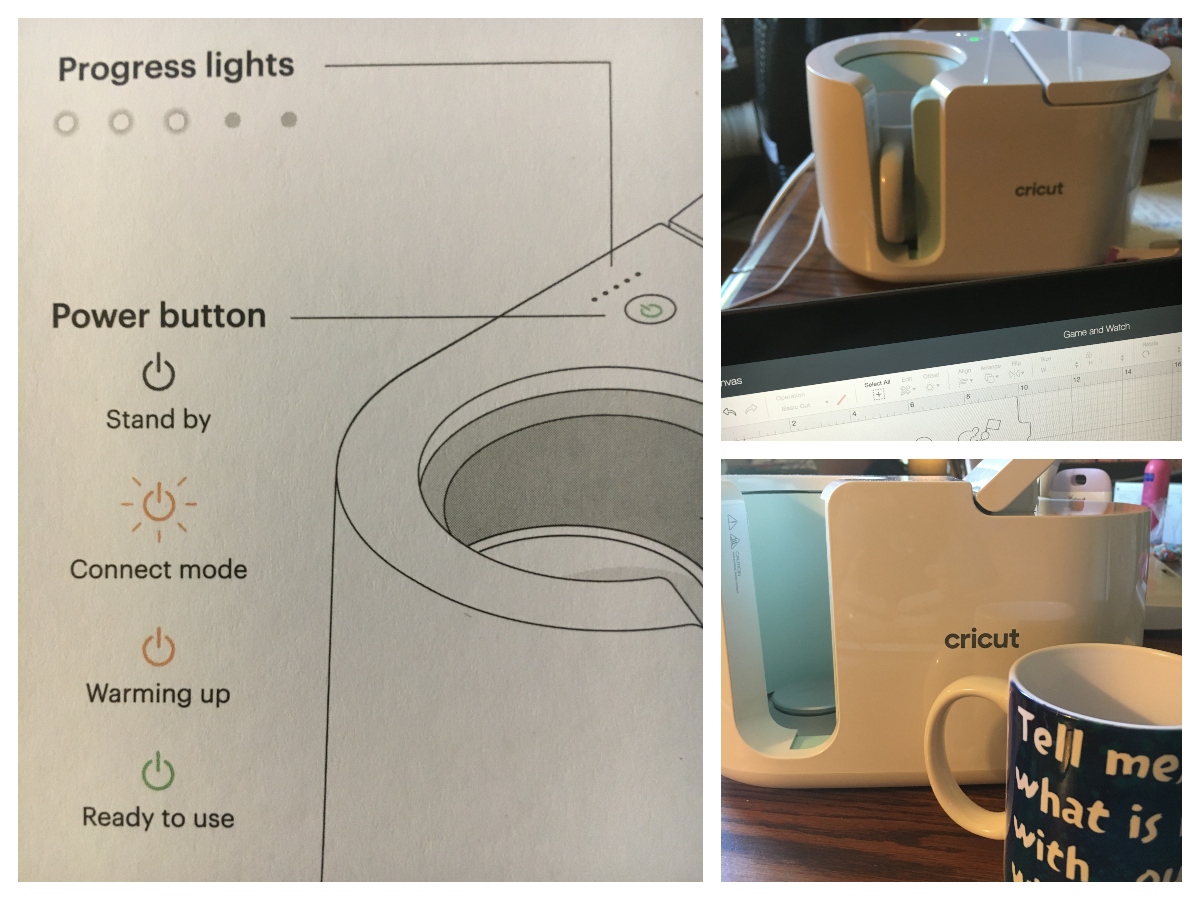
Once Design Space has done its thing, simply turn it on and you are ready to go. I absolutely adore the simplicity of the machine. No guessing temperatures or times: the Mug Press does that for you. Taller mug – it knows. Thicker butcher paper – it knows. Previous attempts at mug making using various Sharpies, an oven, and some burn cream are a thing of the past. The light that indicates the level of operation should be a standard feature on everything. Perhaps even on people; are you connecting or ready to use after your morning cup of coffee?
We pulled up the Personalized Monogram Mug project and I swear to the god of crafts that I had every intention to follow the project step by step, change nothing, and do a plain vanilla run through. But I didn’t want to monogram a mug; I don’t have anything with a monogram on and don’t intend to start now. So I did a thing.
Tell me, what is it you plan to do with your one wild and precious life. – Mary Oliver

It wasn’t until I had handled the Infusible Ink Paper, followed the step by step instructions in Cricut Design Space, and started weeding my project, that I thought about what I had done. I remembered why I wanted to start simple. It was traumatizing trying to weed a substance I had never used before, trying to get the blank space in all the vowels. Worrying with every pick and flick that I had done something wrong. And then, suddenly, I went from trauma to delight. When I could see the design in all its glory, I knew that this process and I were going to become besties. I also saw that I had a problem.
Tell me, what is it you plan to do with our one wild and precious life.
Instead of “your one wild and precious life,” I was now using “our one wild and precious life”! I checked the project each step of the way, and when I realized it wasn’t my fault I felt much better.

I’m still not sure why the “y” disappeared between the final two stages of creation, but I now understand the value of checking your design at each step of the way, instead of just the first, ahem. Check thrice, cut once after all. Rather than waste a whole sheet of Infusible Ink Paper (cha-ching) I decided to go ahead and misquote Mary Oliver, for what we will call an anniversary gift for my husband. After all, my wild and precious life morphed into our wild and precious life years ago. That’s my story and I’m sticking to it.
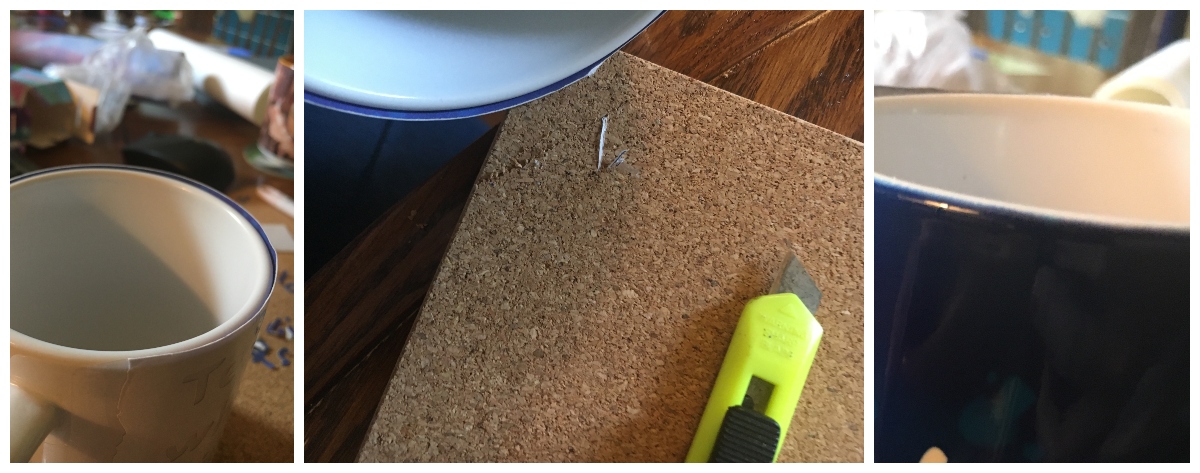
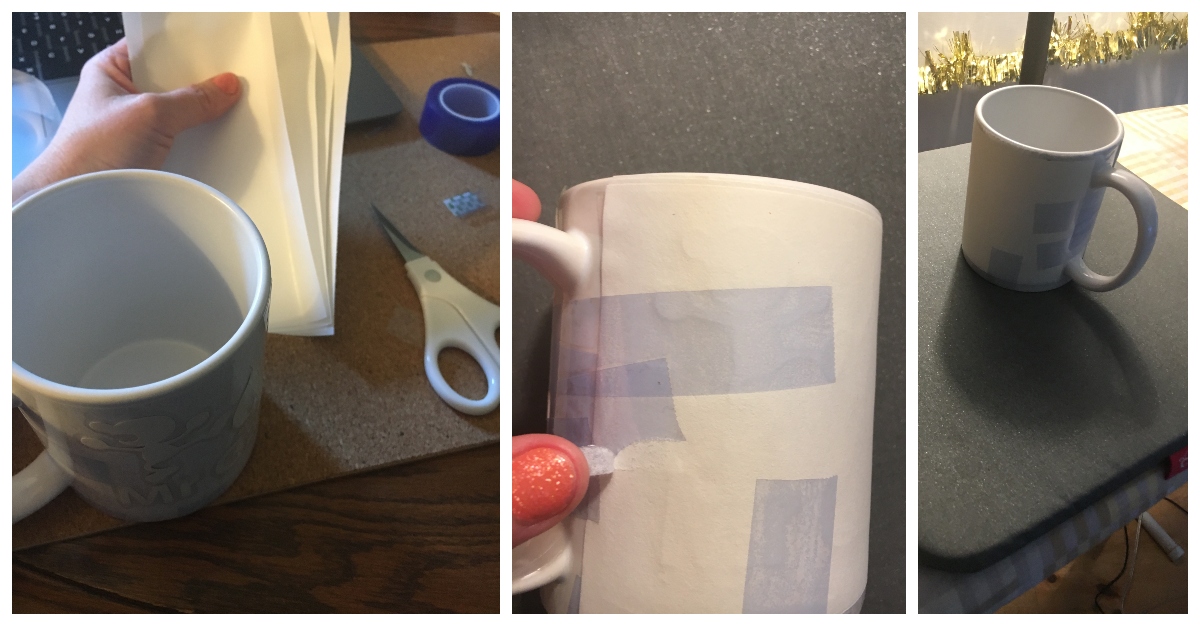
Once I had pulled Mary Oliver from the weeds, we were ready to stick and press. I had a few issues getting the paper in the right position, but you can tell that this is something that improves over time. I have no muscle memory for this yet, but I will in a few dozen mugs’ time. One problem that none of the videos had prepared me for was that my fully inked transfer sheet was taller than the mug I had set it to. I could find no examples of this online, but since in all the videos I watched, none of the paper went above the rim of the mug, I pulled out my trusty blade and clumsily trimmed off the excess. I was about nervous about this, but spoiler alert, the rim came out great, and I think it would have been fine even without trimming. I have to remember not to second guess myself on everything; it’s a life long process and I may still be in “Connect Mode.”
I had How-To videos running in the background the entire time, like a crafting play-by-play. Switching between the official Cricut channel and whatever blogger I happened upon with the key word search “Cricut Mug Newbie,” “Cricut Mug should it look like this,” “Cricut mug backwards.” In this way I pushed my way past all my fears, until we were ready to load into the Mug Press.
At this point I remembered seeing something about the angle of insertion being important, and went back to a few videos. I left Anna at Cricut running, and she and I did a tandem insertion. I didn’t burn myself which is a huge hurrah in my book; I usually burn myself when ironing perler bears so I feared this would be the same. Once the mug was in, I simply pushed the lever down, pressed start, and watched it go. In the time it took my mum and I to look up a few more images and chat about a recent trip to Kohl’s, the mug was flashing and pinging that it was done. We released the lever and pulled the mug out carefully; I still did not burn myself. It looked different than when it went in, and wasn’t too inspiring. However, I learned from my first T-shirt making foray with the maker, that you should listen to all the people. I set the mug on the mat, and left it alone. When it was actually cool to the touch, and not five minutes early when I was trying to tell myself that it was pretty much cool enough to the touch, we pulled the backing off and had our socks knocked clean off.

It was neat, it was beautiful, it was smooth, and I told my husband that I really did know what I was going to be doing with our wild and precious life. Hint, it was making mugs, many, many mugs. The finished product surpassed all my expectations, and I really should start to listen when Cricut tells me that something is going to be awesome. My naturally occurring British pessimism keeps proving me wrong as I finish each new and more delightful project.
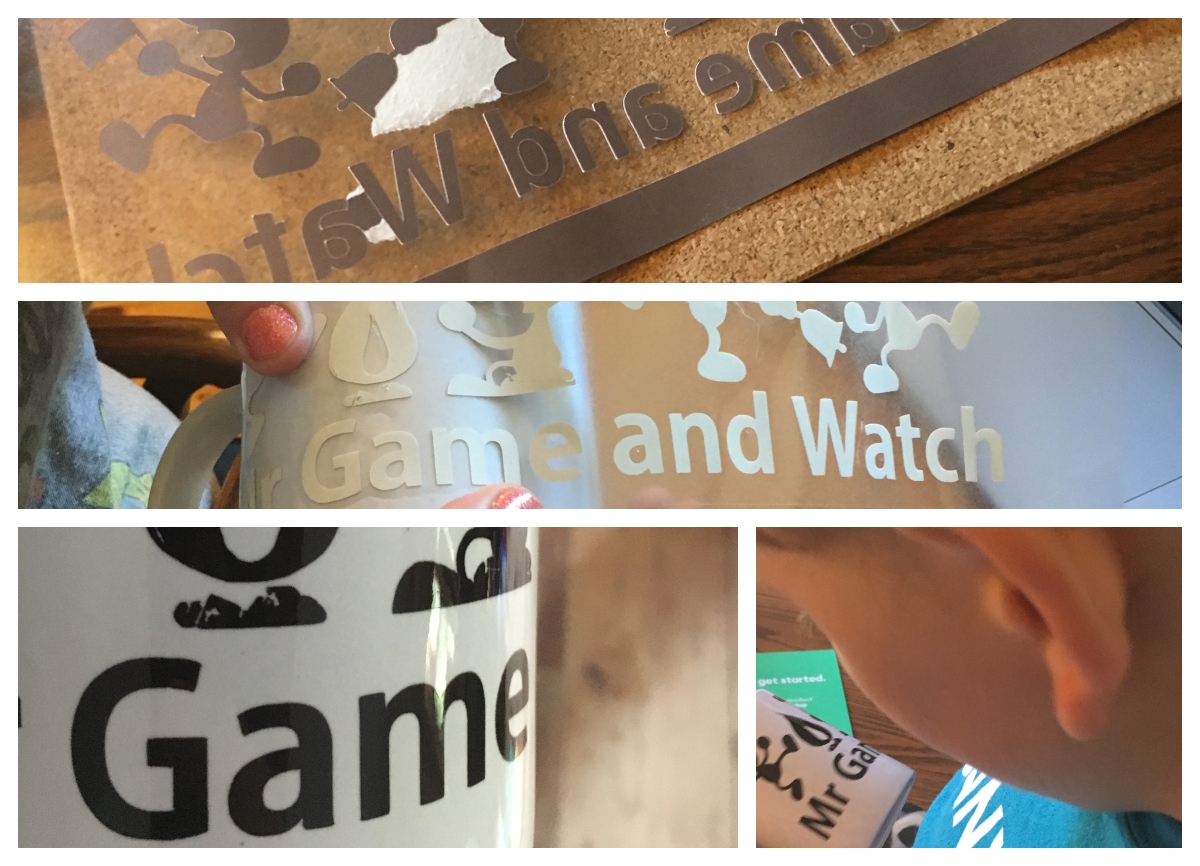
My kids were super excited about this product, and our first simple project roused their creative urges even more. For years one of our go-to gifts for their Grandad has been photo mugs from Snapfish or Shutterfly, and so they are very familiar with the art of the personalized mug. Heaven help me when they discover the existence of sublimation printers! My eleven-year-old is in the middle of the Pendragon series by DJ McHale, and has plans for a cocoa mug with all the emblems from the series on it. My daughter just wants to play; I assume a variety of cartoon bottoms will end up on hers . My middle child, already a huge fan of the t-shirt I made for him while checking out the Cricut Maker, came up with his design first though, and so his was the next mug.
Thankfully his design was the reverse of my first project, with more white space than infusible ink, and I was pretty eager to see how this one would work. I wanted to think it would be easier, but maybe not as stunning. It was actually a little trickier, again, that muscle memory will come with time, but it was just as stunning when complete. I found that weeding the large areas to leave behind the small caused more tearing than vice versa, but never in a way that affected the finished product. With this design I wrapped the mug in butcher paper prior to pressing.
I was curious as to why my step-by-step for the first mug hadn’t involved this step, and so while watching the mug do its thing in the Mug Press, I found some advice about butcher paper from a few bloggers. Most said that you should use it even if the recipe doesn’t quite call for it. Like Nutmeg. Libby’s pumpkin pie recipe doesn’t call for nutmeg, but you should sprinkle it on top anyway. It’s just better that way. The Butcher Paper will prevent any accidents or omissions that might leave residue on the inside of the mug press. Residue inside the chamber could transfer to future projects so better safe than sorry. The official line from Cricut is that you don’t need to use Butcher Paper when doing a project involving a full transfer sheet, like my Mary Oliver mug. The official line from all the YouTube crafters is that you should always use it anyway.
Tips and Tricks I learned along the way:
- Use a new blade if you can. The Infusible Ink Paper is like a sturdy cardstock, and the sharper the blade the better. I plan on keeping one aside for this paper, and using a different blade for all other projects.
- Triple check your design before you cut so that you aren’t surprised by a missing letter or image. Though I can find no evidence online that this is a common problem, it’s still something that I should have thought to do.
- When in doubt, use the butcher paper. Many of the videos will tell you that you don’t need to use it on a design with little white space, as there is little chance of you fusing something unwanted to the mug. However the purpose of the butcher paper goes much further, and helps keep the ink from getting onto the inside of your press. So if you’re not sure, just use it.
- Keep an open window. The first few times you use the Cricut Mug Press it will smell like a new appliance—shocking, I know, given that it is a new appliance. The odor will diminish, but it will never completely go away.
- You can search for any image you want, but be careful of copyright, and be aware that official images and crafter-designed SVG files provide cleaner cuts.
- Never judge a color by its color. The color of the ink on the box is the color you will get, the color of the paper that comes fresh out will appear much different, Black is Brown, Dark Blue is Grey, and so forth. It’s not a packing error, it’s the nature of the ink, so don’t worry.

- Cut the paper before you cut the paper. If you are used to scrapbooking, you might be like me and your first instinct is to put a 12×12 piece of paper on the mat to cut a 4×4 image. Cut the paper to the required size before sticking it to your mat. Less handling means less oils transferring from your hands to the product.
- No, you can’t infuse ink underneath the handle.
There is not a single person in our house who is not excited about making a dozen more mugs with the Cricut Mug Press. We only have four left in our package, and I have already determined that the next project has to involve the infusible ink pens. I’m very good at finding and arranging images, but with a free hand what will I do? If this experience has taught me anything it’s that instead of being nervous about my own talents and perceived limitations, I’m going to be excited by the world of possibilities ahead thanks to this marvelous device.
Disclaimer: GeekMom was sent review samples of most items in this post.