

The Plague Doctor has been a popular costume for the past few years, but this year it seems to really fit with the times in a darkly humorous way.
The Plague Doctor mask isn’t very hard to find in several varieties, but this centuries-old figure is also often seen with a winged staff.
According to LiveScience.com, the look of the Plague Doctor’s staff we often see today was first created by Paulus Fürst in his satirical engraving from the 1600s translated as “Doctor Beaky from Rome” where he added a little stick with an hourglass and bat wings to the plague doctor costume. His look is still part of the popular vision of the Plague Doctor today. If you want to learn a little more about the “costume” of Plague Doctor, see my “Eerily Easy Lil’ Plague Doctor Craft” from earlier this year.
Whether historic or fanciful, the Plague Doctor’s staff does add to the cool appearance of the costume and isn’t that hard to make with a few household items.
For a basic, staff, you’ll need:
- Two empty plastic water bottles (the individual 16 oz kind)
- One wooden pole (an old broom or mop handle is perfect)
- Some scrap pieces of corrugated cardboard
- (Optional) Embellishments, such as metal gears, ribbons, strings, feathers.
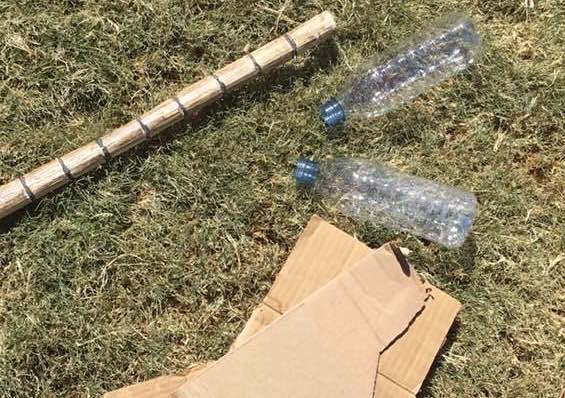
The staff basics, two water bottles, cardboard, and a wooden pole.
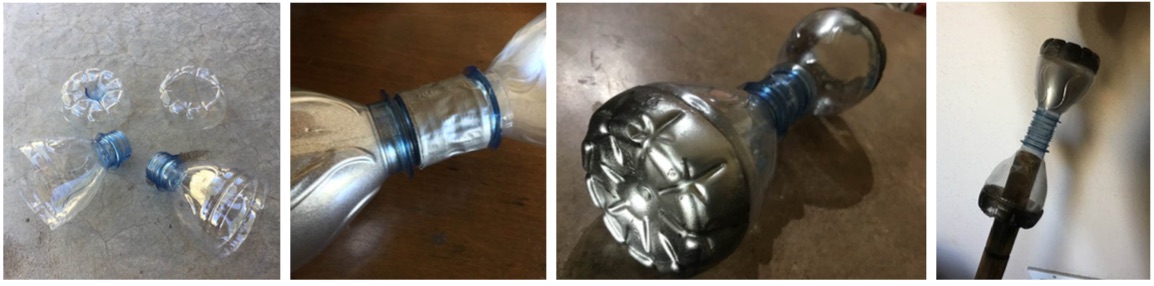
For the Hourglass: Cut the bottom and curved bottleneck area off each of the water bottles and cut a hole in the middle of one of the “bottom pieces.” Paint the bottom pieces black or silver on the inside. (It will show through the clear plastic and stop from getting scratched that way.) Using a few drops of jewel glue or super glue, place the bottom pieces over the open, wide end of the bottlenecks. Then, use a glue gun to adhere the two mouths of the bottles together. Now, it looks like an hourglass. The center can be reinforced with duct tape or with ribbon or felt glued around it.
Place the bottom piece with an open end over the end of the wooden pole, and attach it to the pole with a good amount of glue. I used a glue gun and held it in place for a few minutes.
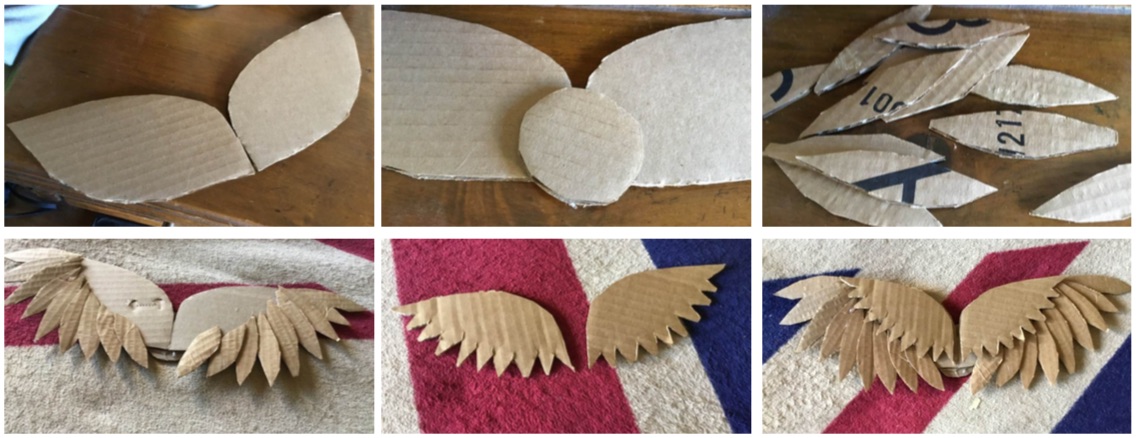
For the Wings: The original staff image features “bat wings,” but for this staff DIY, I wanted my wings to have a more full, feathered look. Cut two cardboard pieces about 6″ each into slightly off-centered tapered ends. (They might look a little like cat eyes.) Glue a round cardboard disc on the back to hold them in place.
Cut several “feather-shaped” pieces of cardboard and glue them along the bottom half of each wing as shown below.
Cut two smaller pieces for the top of each wing, the same shape as the larger base wing pieces, but about half the size. Cut a zigzag pattern on the bottom to give it some texture.
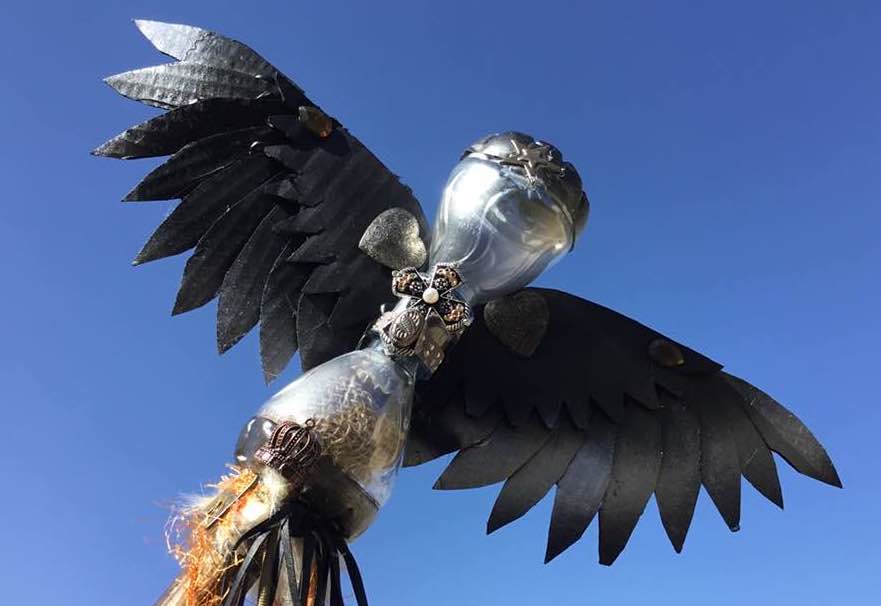
Paint the wings black (or whatever color you like) and glue them to the back of the “hourglass.”
That’s the basic staff, so now you can customize it to look the way you want.
If you want to make it look a little fancier, add some embellishments like steampunk charms or jewels to the hourglass and wings, and string some ribbons or rope around the staff, so they hang out of the bottom of the hourglass.
I made mine sort of a Road Warrior-type of staff, so I included feathers, paracord, and little pieces of hardware like hex nuts or washers.
This Halloween will be long remembered as one that had a weird shadow of a world pandemic lurking around, so make sure to be prepared, and have the look to match.

