In my last Happy Planner post, I went over the basics of using the system. Today, I’ll be going over how you can take multiple planners and combine them into one planner that suits your needs (aka Frankenplanning).
To start you will need to answer a few questions:
- What do you want your planner to do for you?
- What kinds of things will you be tracking, planning, or taking notes on?
- Ideas for tracking include fitness, faith, books, goals, daily life, kids, school, etc…
- What accessory packs will you be incorporating?
- Do you want to budget your money?
- Track goals?
- Plan meals or fitness?
- Do you need a spot for notes?
Got your answers? Okay, let’s begin.
First up. Pick your books.
First things first, you will need to pick your books. That means finding a planner for each application you need and in the size that fits your lifestyle. To me, this was the hardest part of the entire process. Don’t be afraid to use more than one of the same planner if you find one that works for you for more than one application.
For this post, I’ll be utilizing three books, all mini size:
The Ooh La La planner is for my day to day planning. The Stargazer is where I’ll be storing my son’s school assignment information, and the notebook will be for anything I need to remember (lists and such) but don’t want to clog up my weekly area with it.
The three books combined will not fit in the original discs, so I had to grab the expander discs to make this work.
Second. What accessories do you want to use?
I will be utilizing the meal planning, habit tracker pack, and filler paper pack as well as a set of larger discs.
I will also have some half-page filler paper for random notes that need to go from week to week with me.
Time to start Frankenplanning.
This is the easiest part of the whole thing. Putting it together!
Decide how you want your planners laid out when combined. For me, I wanted my personal stuff first, my son’s school stuff second, and my notes section last.
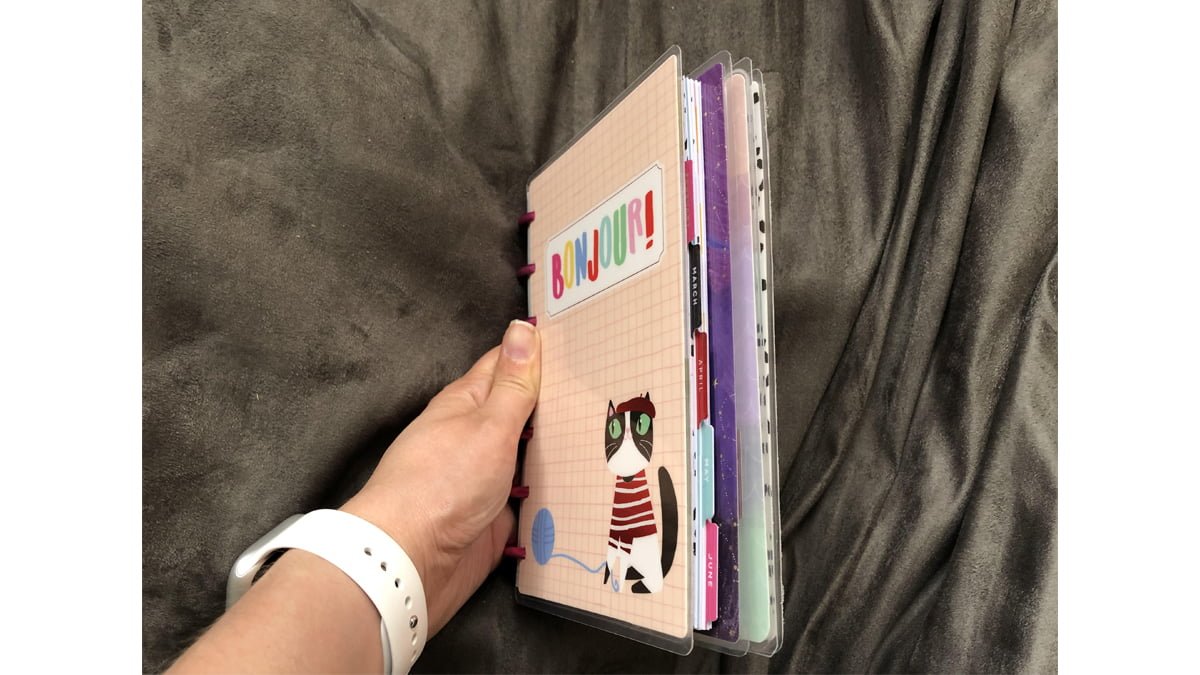
To start, I took out the first 6 months of the Ooh La La planner and put them on the new discs. Then I took the cover and the first five months from the Stargazer planner and put them in. Last, I took the cover from the notebook and about half of the blank pages and their tabs and put them in the back. The last page is the back cover to the Ooh La La planner. Keeping the covers of each of the books with the pages from that book helps you skip right to that part of your planner quickly.
Once that was all done, I wrote out my 2020 goals on a piece of the filler paper and put it as the first page behind the cover of my main planner. This will remind me to look at it often and when I want to work on a goal during a particular week, I have it handy to reference.
Finally, I opened my meal planning pack and put the first week of meal planning in the first week of my first planner. I also put in a habit tracker and wrote down a few habits I plan to track the first week of the new year.
What do I do with the other months/pages?
I keep the rest of the pages from the Ooh La La planner and the Stargazer planner together in their original rings. This way when I want to grab the next month or put a month away, they are right there.
Wait? What about stickers?
You will notice that I’m not using any stickers. I hate carrying that kind of stuff with me, so I keep those in my file cabinet at home and once a week when I’m planning, I’ll open my planning drawer and put in stickers if needed. I don’t stress over the use of them though. Stickers alone could be a post by themselves.
Congratulations. You’ve just Frankenplanned!
When I first started with Happy Planner, I was a bit unsure of using it because it felt restricted in the size of the books and what they offered. Once I learned about Frankenplanning, I was hooked and realized how well this amazing system could work for me. Now, I have a drawer at home dedicated to my planning supplies and the pages I don’t put in the books for now so I’m organized when it comes to replacing and taking out months. One fear some people might have is ending up with a bulky planner. I’d like to tell you that even with all this combined, it did not turn out bulky so don’t be afraid my young padawan. It will turn out all right in the end, you’ll see.
Disclaimer: GeekMom received a review sample.


