Reading Time: 5 minutes

TIL that Shrinky Dinks came out the same year that I did: 1973. October 19th, to be exact. I remember playing with them as a kid. Most kids of my generation will remember coloring and cutting out Shrinky Dinks as a playtime or party activity. My first memories of it were probably in the late 1970s. I always thought they were cool, and I loved the finished results. Then they fell off my radar for a couple of decades. Recently, the Shrinky Dinks folks sent me several new sets to try out to celebrate their birthday. But first, let’s cover some history.
The Shrinky Dinks company was started by a woman named Betty Morris, who was a Cub Scout Leader. She was trying to help her troop make Christmas ornaments, and she heard about crafts that used plastic that shrank in the oven. She had so much success at it that she and her co-leader, Cathy Bloomberg, went into business together and made the first Shrinky Dinks kits. They sold like hot (plastic) cakes!
Here are a few fun facts about the company and product:
- Some of the names the ladies considered for the brand are Shrink Small, Shrinky Small, Shrinky Little, Shrinky Dinky, and Shrinky Dinkies. But Shrinky Dinks won out.
- When baked, Shrinky Dinks shrink to 1/9 of their original size and are nine times thicker. (The packaging says they get to be 1/3 their original size, but, since that’s 1/3 in each direction, it’s 1/9, because math.)
- Some therapy groups use Shrinky Dinks as a tool in art therapy.
- In 2014, a team from Harvard University and MIT used Shrinky Dinks to make self-assembling robots. (Maybe this is an idea for fabrication on Mars?)
Shrinky Dinks products have periodically resurfaced over the years. I rediscovered them when my own kids were old enough to partake. I never quite mastered the baking time, and sometimes we ended up with warped results. But it was still fun, and I still have a number of the pieces we did. My kids also took whole blank sheets and made little cards for me, which we then baked, so they now take up a lot less room! We also have some Christmas ornaments that we made.

The company is currently offering quite a number of jewelry-based project kits, as well as some playsets, a few other kinds of kits, and some open-ended blank sheets. With their focus on jewelry, obvious gendering, and often pink and purple packaging, the company seems to be directing much of their marketing toward what they think girls will like, including only having girls on the jewelry kit packaging. They do offer some products with other themes, though, such as the Mini Racers Activity Set, the Teenage Mutant Ninja Turtles Playset, and sets focusing on pirates, robots, dinosaurs, and vehicles. These packages have no kids shown on the front. There are also Creative Packs that have blank sheets of different kinds of Shrinky Dinks plastic for completely free-form play and creation, including one pack that can be printed on with inkjet printers; these blank sheets are my favorite products since you can create whatever you like in whatever size you like.
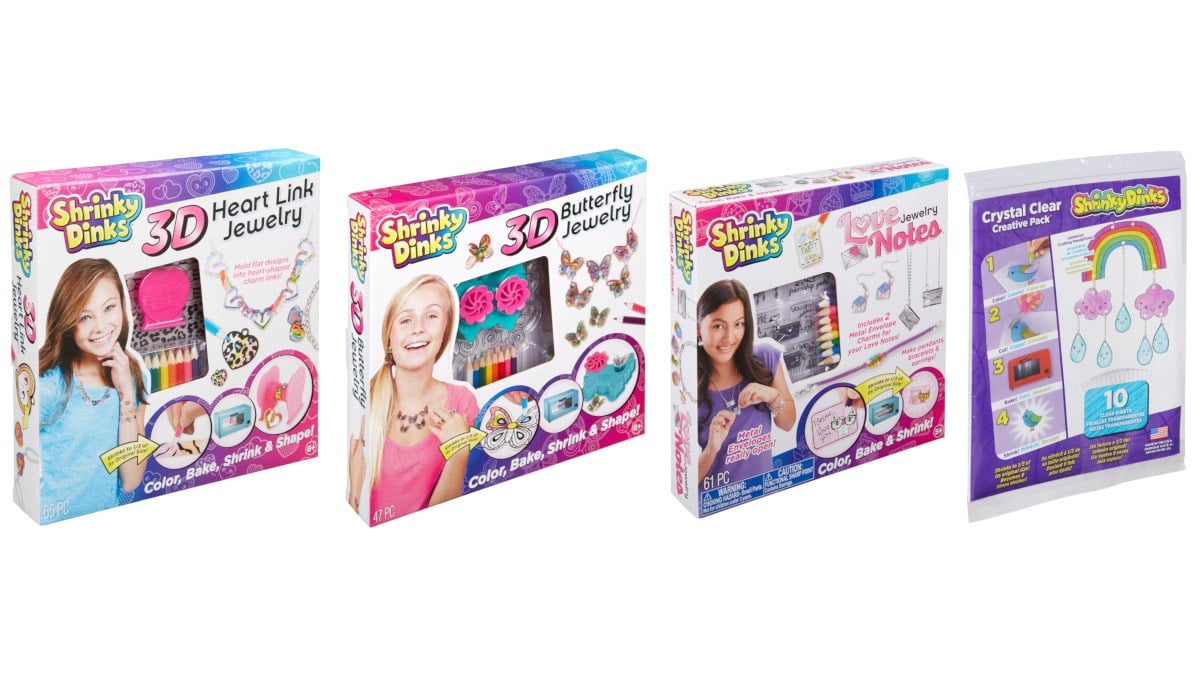
I was able to try out a few of their sets including Love Notes Jewelry, 3D Butterfly Jewelry, 3D Heart Link Jewelry, and a package of plain, shiny sheets that you can use, freeform, to do any patterns or styles you like. I decided to recruit my whole family to help: my husband Rory, my 17-year-old daughter, and my 14-year-old son. I mostly worked on the Love Notes Jewelry, since it appealed to me. My daughter worked on the Heart Link Jewelry, and the boys worked on the Butterfly Jewelry. Then we all played around with the plain sheets together.
Playing with Shrinky Dinks is exactly as I remember it was as a child, and also when I found them again when my kids were little. It’s nice to know that some things don’t change, especially when they worked so well the first time. I did learn a few lessons, though, which I share below.
- Depending on the kind of plastic in your Shrinky Dinks set, you can use permanent markers, alcohol-based inks, or colored pencils on them to great success. (The shiny ones do well with markers and ink, and the textured ones do well with colored pencils.)
- Remember to punch any holes in your creation before you bake them. Use a standard-size hole punch.
- The plastic totally picks up fingerprints, which stick around and turn into tiny fingerprints when you bake the Shrinky Dinks.
- Larger shrinks may not turn out as well as smaller ones, and they may take longer to bake and shrink. But sometimes larger ones do well. It’s fun to experiment.
The Love Notes set was a lot of fun. They include little rectangles of Shrinky Dinks plastic—some printed on, some blank—that, when baked, fit exactly into one of the two included mailbox necklaces. And, though I doubt the chains are of too high quality, they did not turn my neck green when I wore one for a few hours. The pendants are a fun way of carrying little notes of love and affection with you throughout the day, from your kid or your spouse, or even from yourself. The set also includes some mail-themed pieces to color and bake that then can be made into earrings or bracelets.
The Heart Link set was interesting. It comes with a series of long strips of Shrinky Dinks plastic to color, and then it has a silicone mold to wrap the strips around to make a heart shape. You then bake the whole thing, and they form smaller, thicker, hard plastic hearts (see image). Along those lines, though, you could use the mold to make other interesting shapes with the strips. Use your imagination! The set also comes with heart-themed pieces to make into earrings or bracelets.
The Butterfly set was a bit more tricky. This set comes with a large number of butterflies of different sizes and styles. You’re meant to then bake two of them at a time in the included silicone mold which will give you a three-dimensional butterfly shape in the end. This worked sometimes for us, and sometimes not quite so well. You have to set them up just right or they end up either flat or almost like a cylinder on the bottom, shaped like the container (see image). I suggest practicing on the ones you’re less attached to until you get it right. But you can then use the results in a variety of jewelry pieces.
Finally, we all played with the blank sheets of shiny Shrinky Dinks plastic, the Creative Sheets in Crystal Clear. I was used to using the textured plastic material, which all of the above sets have, and which all the previous kits I’ve used have had. But the Creative Sheets in Crystal Clear format are shiny on both sides. Thus the colored pencils don’t mark well on the plastic. But Sharpie markers, other permanent markers, or any alcohol-based ink works well. It can still smudge, though, so be careful.
We had a lot of fun with this set. You can make little things, big things, things that combine together to make other things (like a mobile)… Your imagination is the only limit. I especially enjoyed putting some color on both the front and the back of the plastic. Because the plastic thickens up significantly (9x) when you bake it, the finished result has a bit of a parallax effect, which looks really neat.
So, being a life-long fan of Shrinky Dinks, I have to say, they are still just as fun and awesome as ever. My favorites are the Creative Sheets sets of blank plastic, but the other sets are fun too, especially for younger kids who like to play with the end result or wear them as jewelry. Plus, this is the kind of activity where parents can get in on the fun. Perfect for a rainy day, a cold day, or just everyday. #ShrinkyDinks45
Note: I received some samples for review purposes.
Click through to read all of “Step Back in Time With Your Kids for Shrinky Dinks’ 45th Birthday!” at GeekDad.If you value content from GeekDad, please support us via Patreon or use this link to shop at Amazon. Thanks!