Reading Time: 5 minutes

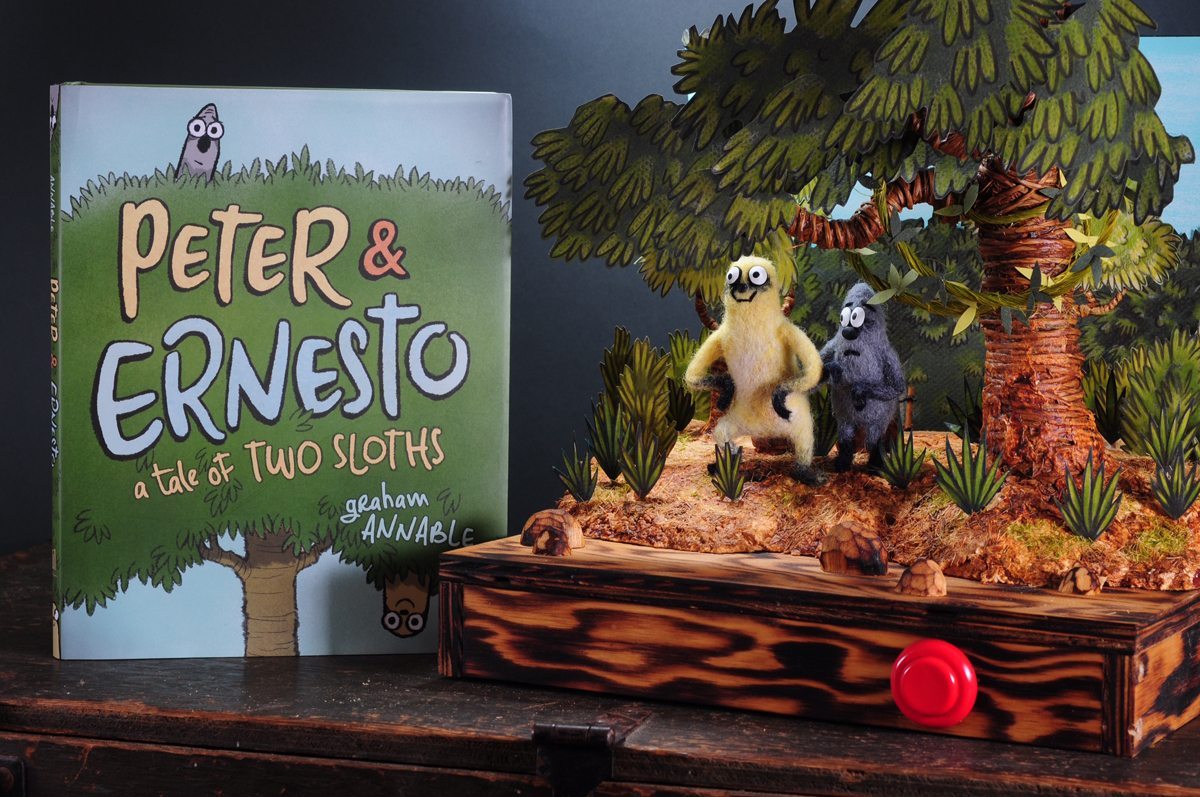
Hello! My name is Graham Annable and I’m the creator of the new graphic novel for kids titled Peter & Ernesto: A Tale of Two Sloths. As you may have deduced the story is about two sloths, Peter and Ernesto, who are the best of friends and yet couldn’t be more different in personality!
I was asked by a local bookstore to create a three-dimensional display to showcase my friendly sloths and their new book. Being primarily a 2D drawer type of person I thought I’d maybe do some cardboard cutouts with some flat backgrounds for the display. But as I surveyed other dioramas at Green Bean Books in Portland, Oregon, I quickly realized I would need to greatly step up my sloth game! I needed a 3D expert. A sloth enthusiast. A former co-worker from my days working on the award-winning stop-motion classic Coraline! I needed my friend Joe Schmidt! I’m happy to say it didn’t take very long to convince him to take on the project and, in fact, I’ll let Joe tell you all about how he caught “Sloth Fever”…

When Graham asked for help with his book display, I became so excited that I wouldn’t let him finish describing the project. I stopped listening after he said, “sloth diorama” and my mind went into overdrive.
We both wanted Peter & Ernesto to have soft fur, so I attempted felting even though I’m new to that medium. It turns out that making felt animals is very simple… you just get a barbed needle and some wool roving and stab it until the wool becomes dense and a character forms that’s so cute you want to eat it. Anyone can do it. The eyes and nose were made with Magic Sculpt putty over a pin, which was a tad difficult. In the future I would have ordered pre-made glass eyes specifically for felted creatures.

To set the scene, I chose to combine several landscape elements from the book that also acted as plot points: the tall vine-laden tree canopy, the chasm with a rope bridge, and the river. The challenge was to combine all three into a 11 x 10 inch base. I sketched some ideas out beforehand but I really loathe all forms of pre-planning and mock-ups. I think it’s better to just start building, and then make drawings afterward. (Even better: I do the drawings afterward, in a coffee shop, while pursing my lips and muttering, “hmmmmm.”)

The trees were made from twisted baling wire wrapped in jute. All the foliage is layers of Canson paper with leaf detail drawn with Prismacolor pencil. I fabricated the trees and shrubs in a variety of scales to give a whimsical forced perspective. The base is made from ½” plywood, which I scavenged from a construction site. To create the river effect, I gently burned the wood with a propane torch and sealed it with linseed oil. By adding carved river rocks to just the right spot, the wood grain turned into whirling eddies. Fortunately this was passable enough as a river that I did not have to pour any gloss medium or resin.

The landscape was carved foam covered in Sculptamold, which is a powdered papier-mâché product. I mixed it with water to a “sour cream” consistency and troweled it on with a palette knife. This putty also helped form “root bases” that blended the trees into the ground. My favorite method to make grass is to untwine Manila rope fibers and snip the fibers into tiny bits. Then I sprinkle it over blobs of Sobo glue. (I only use Sobo, Titebond, or other PVA style glues to build with. Under no circumstances will I use a hot glue gun, because I’d rather not hold a smoldering tube of melting nylon that’s waiting to burn me.)

Another challenge was the lighting. The cubbies in the bookstore where the diorama was to be displayed are deep, and the ambient light falls off quickly, So Graham asked me to rig some self-contained lighting. From All Electronics, I ordered some special multi-LED bulbs that use a MR-16 socket, which is a common 12v spotlight. I also ordered an “arcade” style button and a 9V battery with terminals. These were mounted under the base and the wire ran up the tree trunk and splashed light all over the back of the set. The button only activates when depressed, so the battery should last the duration of the exhibit. Since the LEDs came with pre-installed resistors, the wiring was straightforward… just a power source and a switch. The arcade button turned into a nostalgic throwback… it harkened to gauzy memories of a grade school field trips to a science museum.

All of the paint is Golden acrylic, which is the best pigment for the money and it’s available at any reputable art store, as are Prismacolor and Canson products. It’s always wise to spend your money on the best paint and paper, and then beg, borrow, and steal everything else. All of my other materials (besides the electronics) came from construction sites, flea markets, thrift stores, my backyard, work, city parks, dumpsters, and sidewalks. I never buy craft supplies at Jo-Ann’s or Michael’s because walking though those stores feels like being suffocated by a bag of Polyfill batting while listening to an audiobook of Jewel’s poetry. Besides, materials are everywhere. You are surrounded by viable diorama making materials. They’re yours for the taking.

For instance, a contractor next door left me an old cedar fence, and it’s been a gold mine. I used the boards to build a special sloth diorama carrying crate, so Graham could transport Peter & Ernesto in complete safety. (One thing I learned is that when you walk around with a rustic crate people give you a WIDE berth.)
I had so much fun with this project that I made another display for myself. The little guys were so cute that I couldn’t bear their absence. This is how I caught Sloth Fever.
Click through to read all of “Creating a ‘Peter and Ernesto’ Diorama” at GeekDad.If you value content from GeekDad, please support us via Patreon or use this link to shop at Amazon. Thanks!


