It all started when my youngest son, Johnny, came home from school one day with an assignment to create a timeline of his life. He had a piece of paper with a basic ruler style timeline on it, and he was supposed to add his birth date, his first day of kindergarten, and his first day of 4th grade plus seven other life events that stood out to him. What a cool assignment! I was inspired to see what types of free timeline tools existed on the web and if Johnny would enjoy completing his assignment using one of them.
I stumbled upon an article that provided a list of eight free pieces of timeline software geared towards teachers and education. It was like striking gold! I decided to give the first one in the list, Tiki-Toki, a try. I registered for the site and created one entry for Johnny’s birth. After just a few minutes, I understood how to use the software and felt that Johnny would be able to use it to complete his assignment. The method for creating a new “story” was easy to follow. I knew that Johnny would want to include photos in his timeline, so before I set him loose on the software, I worked with him to determine which life events he wanted to document and what photos he wanted to use. I then stored the photos in a folder on his computer’s hard drive and uploaded them to my SmugMug website. Tike-Toki allows you to upload photos or point to an image online.

Once the pictures were ready, Johnny was able to type in the basic info and upload the desired picture. He was nothing short of delighted to see his life’s story come alive in pictures. It was also a great mommy and son bonding moment as we relived the most special memories and events of his life.
We did check with Johnny’s teacher to make sure she was okay with him handing in an online generated timeline, and she was, so after he added about 20 events over three nights, we printed out a copy for him to take to school. I also sent the teacher a link so that she could view the timeline online.
So, what were the pros of using Tiki-Toki? Well, it was easy to enter the title, intro, and media for each “story.” The timeline was also really easy to navigate online. I loved how you could choose a background picture for the timeline and how Tiki-Toki used it seamlessly as the timeline scrolled.

However, there were a few cons too. I wish the date would have updated automatically based on the exif data of the attached photo if available. It was annoying to have to change the date for each entry. Also, when I printed the timeline, it didn’t look as nice as the online version. It was more of a list instead of a timeline, and sometimes the formatting of the text and pictures separated them across pages.
I tried out some of the other timeline software mentioned in the article including Capzles, TimeToast, Time Glider, and Dipity. Capzles didn’t have enough of a timeline feel to it to suit me. However, it was just as easy to use as Tiki-Toki, and it used the photo exif data to set the date. It also boasts the ability to store more types of media than most of the other timeline software tools (e.g., Powerpoint). TimeToast was also easy to use and had a realistic timeline feel plus a list format for viewing. I had technical troubles trying to use the Time Glider website and wasn’t able to evaluate it.

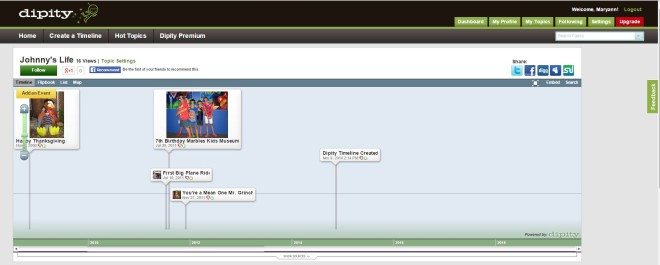
Dipity was the last piece of timeline software that I gave a go, and I really liked it. It organized the events well, was easy to use, and included both a timeline, flipbook, and list view.

Although I found that I had plenty of pictures documenting Johnny’s life and had even blogged about some big events, I was missing some details that I wish I had. For example, I can’t easily tell you the day of his first word. I’m not sure when he sat in the high chair for the first time. I can’t remember the names of some of his preschool teachers or which year he was in what cutesy named class. One picture may be worth a thousand words, but it’s still a good idea to write down some of the background behind your pictures. Using software to create a timeline might be just what you need to preserve both the picture and the story that goes with it. If I had it to do all over, I’d have started a timeline the day Johnny was born and kept adding major life events to it as he grew older. Going forward, I hope that Johnny, with some help from me, will keep adding to his timeline.
For me, it’s a toss up between Tiki-Toki and Dipity. Both are solid timeline creation apps. Since Johnny has so much time invested entering events in Tiki-Toki, we’ll probably continue to use it.


Hello, thanks!