
Granny squares aren’t just for grannies—they make excellent 8-bit patterned afghans, too! You really don’t need artistic talent to complete this project, but you do need time and patience—especially if you are like me and crochet super slowly.
To make a pattern you will need:
- Blank paper, graph paper, or a photo editing program
- An simple image (cartoon, clip art, or 8-bit image) you want to copy
- Markers, crayons, or pencils if you are making your design on paper
- A ruler if you are doing the design on blank paper
Blank paper method:
Use your ruler to draw lines breaking your image into a grid. On average, you will need the finished product to be 39 inches wide and 75 inches tall when crocheting a twin size afghan. So, for a twin sized afghan with three-inch squares you would draw a grid 13 squares wide and 25 squares tall. If you are looking to make a different size afghan, there are guides and calculators out in internet-land that are very helpful.
Put another piece of paper directly on your desired image. It helps to have it on a lit background. Start filling in the squares with your coloring implement. Each square should be one color. So, if you have a square that is two colors, you will need to choose which color works best with the image. Keep in mind that your image will still have square edges even if your original image has circles. Any lines that need to be “drawn” on the afghan can also be added (you will be able to add a chain cable to the top to draw accent lines on the final afghan).
The photo program method:
If you are more comfortable in the digital realm, you can use an image manipulation program like Photoshop or GIMP to make your design (I used GIMP). Create a new image that has the same dimensions as your final product, though the units don’t matter; just use the number of squares for each dimension. For the twin-sized, three-inch-square example, make the image 13 by 25 inches. Then, set the resolution fairly low—maybe 10 or 20 pixels per inch. Our design will very blocky!
Set up a 1 inch by 1 inch grid, offset by 1/2 inch each way, and turn on snap to grid. Each intersection of the grid is the center of one of the squares in the final design. Select a square brush, set to 1 inch size (however many pixels you chose for the resolution). Open the image that you are going to be using for the design as a new layer, then create a transparent layer on top of that—this will be our working layer.
With the grid and the brush, you can now start ‘stamping’ your design. At each grid intersection, decide what color your design needs to be (use the dropper to sample colors of the original image if you’d like) and plop a squares on until the whole original design is covered. You may find that is easier to move the original image above the working layer, set to a low opacity – it’s up to you.
Once the design is finished to your satisfaction, hide the original image and the grid, create a new transparent layer above the current one. Then, render a 1 inch by 1 inch grid with no offset onto the new layer (in GIMP, this is done with Filters->Render->Pattern->Grid; a Google search should be able to tell you how to do this in Photoshop). The resolution is so low that you should be able to get away with a 1 pixel line thickness. Make sure the color is set to black, or another color that will contrast with your design and make it easy to see all of the squares later on.

Putting it together:
Once you have your pattern, it’s time to find out how much yarn you need. First, count up how many squares of each color are in your design. Then, multiply the number of squares of each color by 6.69 yards of yarn per three-inch square, or 12.786 yards per four-inch square (disclaimer: these are approximates, and your yarn usage may vary). This is how many yards of each color of yarn you’ll need. Time to go shopping! Err on the side of too much; it’s easier than scrambling to find more of the same color later.

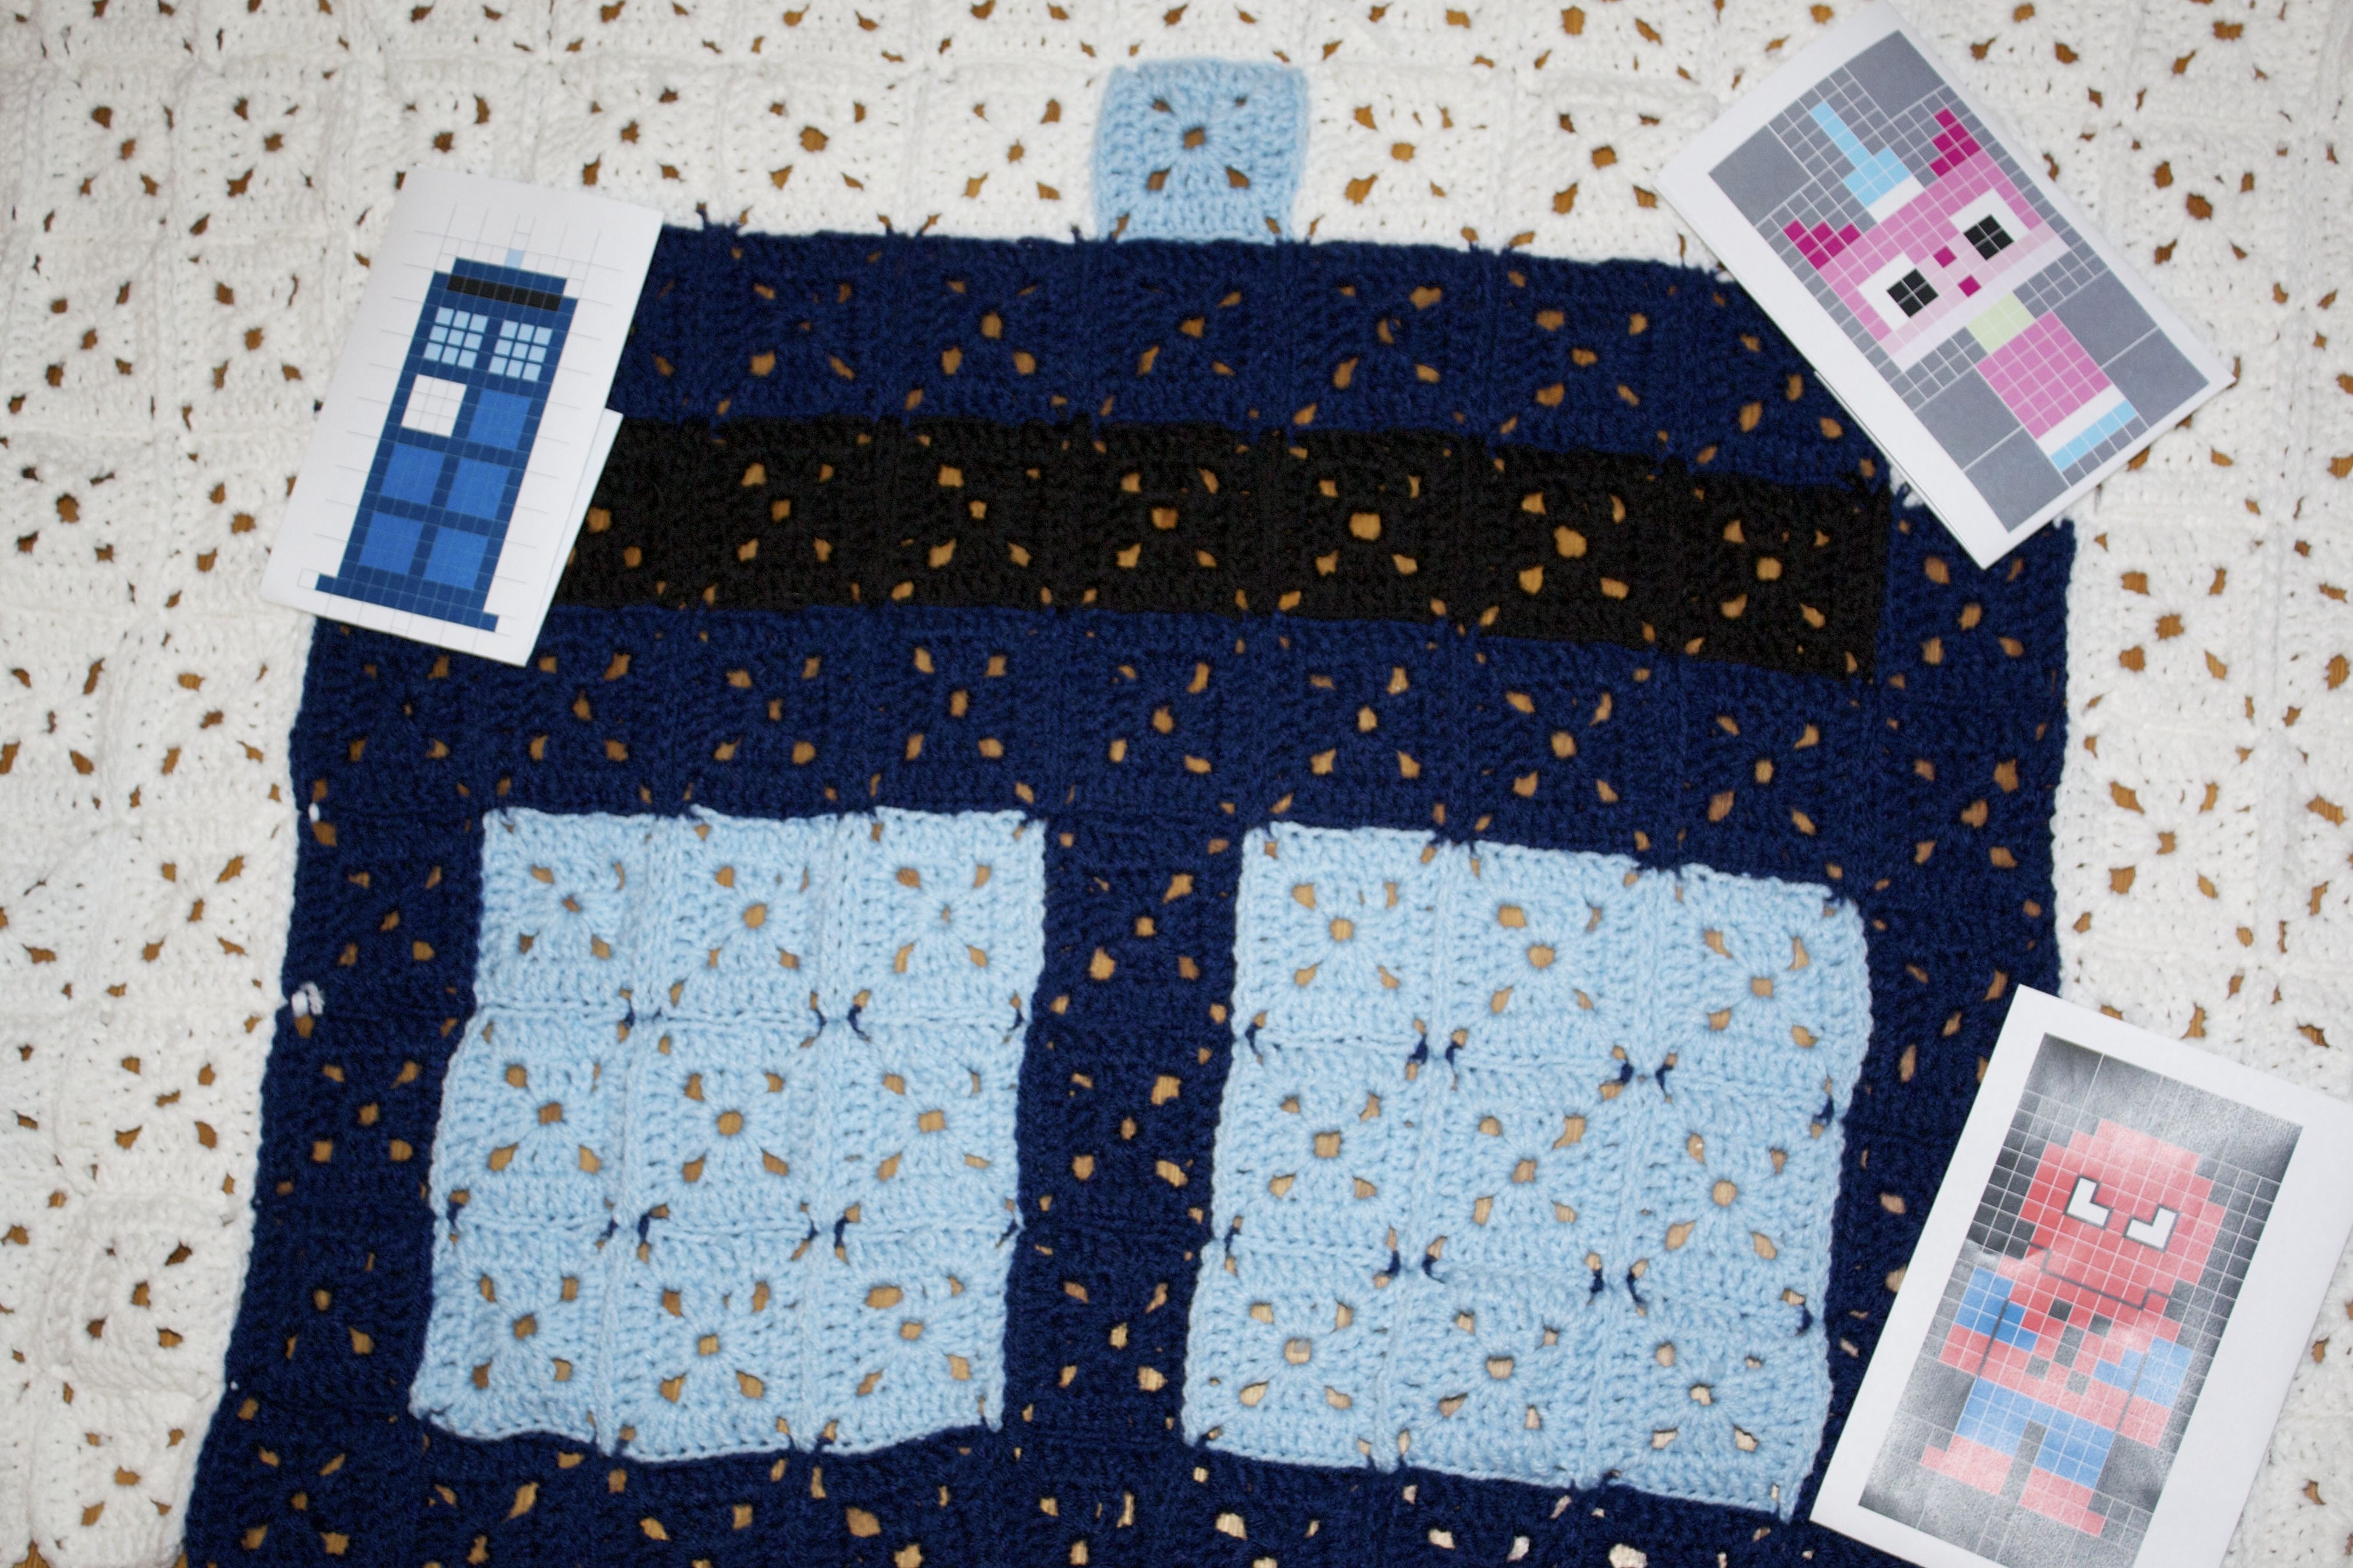
Three-inch TARDIS squares (for a 45 x 69 inch afghan):
- White—1057 yards
- Light blue—127 yards
- Medium blue—301 yards
- Dark blue—675 yards
- Black—47 yards

Four-inch Spider-Man squares (for a 52 x 76 inch afghan):
- Black—1150 yards
- Red—1406 yards
- Medium blue—473 yards
- White—77 yards
Now you can start crocheting! It took me a month and a half of crocheting 5-50 squares a day to complete 336 squares for the TARDIS afghan.
Don’t know how to crochet, or where to start? Feel like it’s just too much? To give you some perspective, I used Red Heart Super Saver yarn. I spent about $30 per afghan. To make a three-inch square, using the video tutorial above, I used an I9
hook, and for a four-inch square I used an H
hook. For both sets of squares, I used the pattern in the video above; I just did four rounds of the square for the bigger squares.
To sew them together, I used these instructions:
I am still working on finishing Spider-Man and the TARDIS before Christmas Eve. If you want to skip the design phase, you can make your own Spiderman, TARDIS, or Princess Unikitty afghan from the designs we made. Poking around on the internet, I even found a Mario pattern! Have you done this before? What geeky patterns have you made?


8 bit afghans are so awesome to make! You can see the one I made my son here http://ravel.me/shaunnalf/ppb
Shaunna! That Pikachu is amazing!
These are so adorable! I can totally imagine snuggling up with one of these and a geeky mug on a rainy day!
http://www.cosplaycents.com
Thanks, Sarah! What character would you pixelate and snuggle up to?