Thanksgiving, Christmas, and the winter holidays are approaching fast, and with it comes the much anticipated extra family celebration: the release of The Hobbit: The Desolation of Smaug.
J.R.R. Tolkien was someone who loved the outdoors, celebrated nature, embraced the magic of the holiday season (even Bilbo Baggins enjoys a cozy Yule on his way back home in The Hobbit), and found ways of incorporating the beauty of the world (in his case, Middle Earth) in his writings.
In this spirit, I’ve put together two simple Hobbit-inspired nature crafts, perfect for fall and winter decorating: Biblo’s Acorn Button bracelet and Thranduil’s Elven Crown. Both of these crafts incorporate the at least one item that can be found through one of my favorite fall pastimes: nature walks. Any time I can walk with my kids and dogs among the beautiful fall leaves and paw around in the trees, bushes, and pond edges makes the day incredible, especially in the fall.

For Bilbo’s Acorn Buttons Bracelet:
• Acorn caps
• Polymer clay, any color
• Plastic or wood buttons, any color (with rim and two or four holes)
• Straw, hemp, or other natural ribbon or twine
• Craft paint (gold and brown)
Thread about 12″ of twine through buttons, set aside.
With a sharp craft knife gently slice the acorn caps in half (make sure an adult does this part).
Take small amount of clay and roll it in a ball small enough to fit under the cap half, and place it on a flat surface to shape into an acorn half. Bake per the clay instructions, to harden.
Use strong craft glue to glue the acorn cap to the clay acorn “body” then glue onto the button.
Paint buttons, gold craft paint. Once dry, dab a little watered down brown paint over the buttons to give it an “antiqued look.”
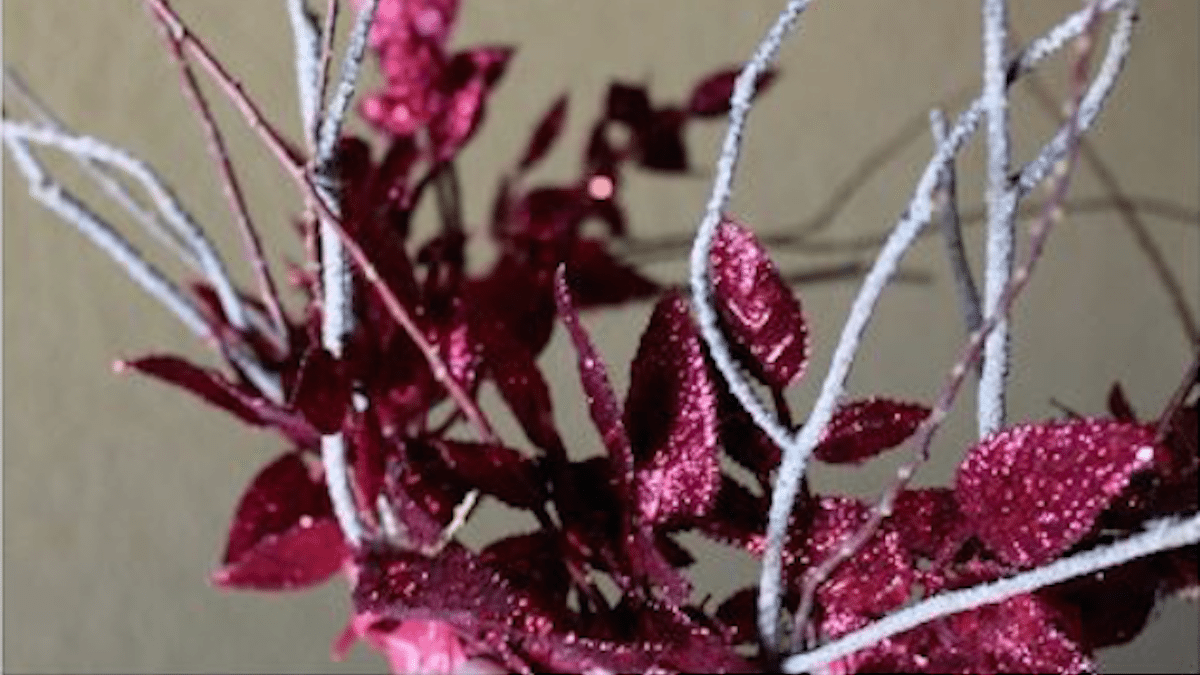
For Thranduil’s Crown:
• Sticks, twigs, or small branches
• Fall leaf sprigs
• Plain plastic headband
• Natural ribbon or twine

Using a glue gun, adhere the leaf sprigs around the outside of the headband. Ideally, these should stick up about three or four inches.
Glue twigs at least twice the height of the leaf springs around the headband in the same manner. The lighter the twigs used, the better.
Glue one or two twigs, at the each end of the headband, so they stick off the “fronts” of the crown. Don’t make these too long.
Wrap ribbon or twine around the length of the headband, to help hold the leaves and sticks in place. Real leaves look beautiful, but some might want to make a more “permanent” crown with artificial ones.
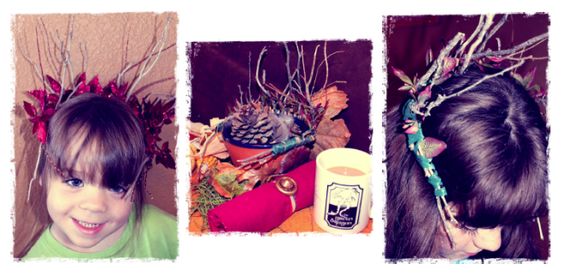
These crafts can also be used to make Thanksgiving table centerpieces, by placing them among dried leaves, pine cones, seedpods, feathers, or foraged items from the neighborhood. The bracelets can also be used as napkin holders or to trim a nature or Hobbit-inspired tree or wreath.
Whatever you decide, I’m sure Tolkien would approve.


2 thoughts on “Hobbit-Inspired Fall Nature Crafts”
Comments are closed.